2. How to Build a Table
Step-by-step
Drag in components
A typical table page has a filter, table, and pagination. Fusion UI provides these—find them in the left component panel.
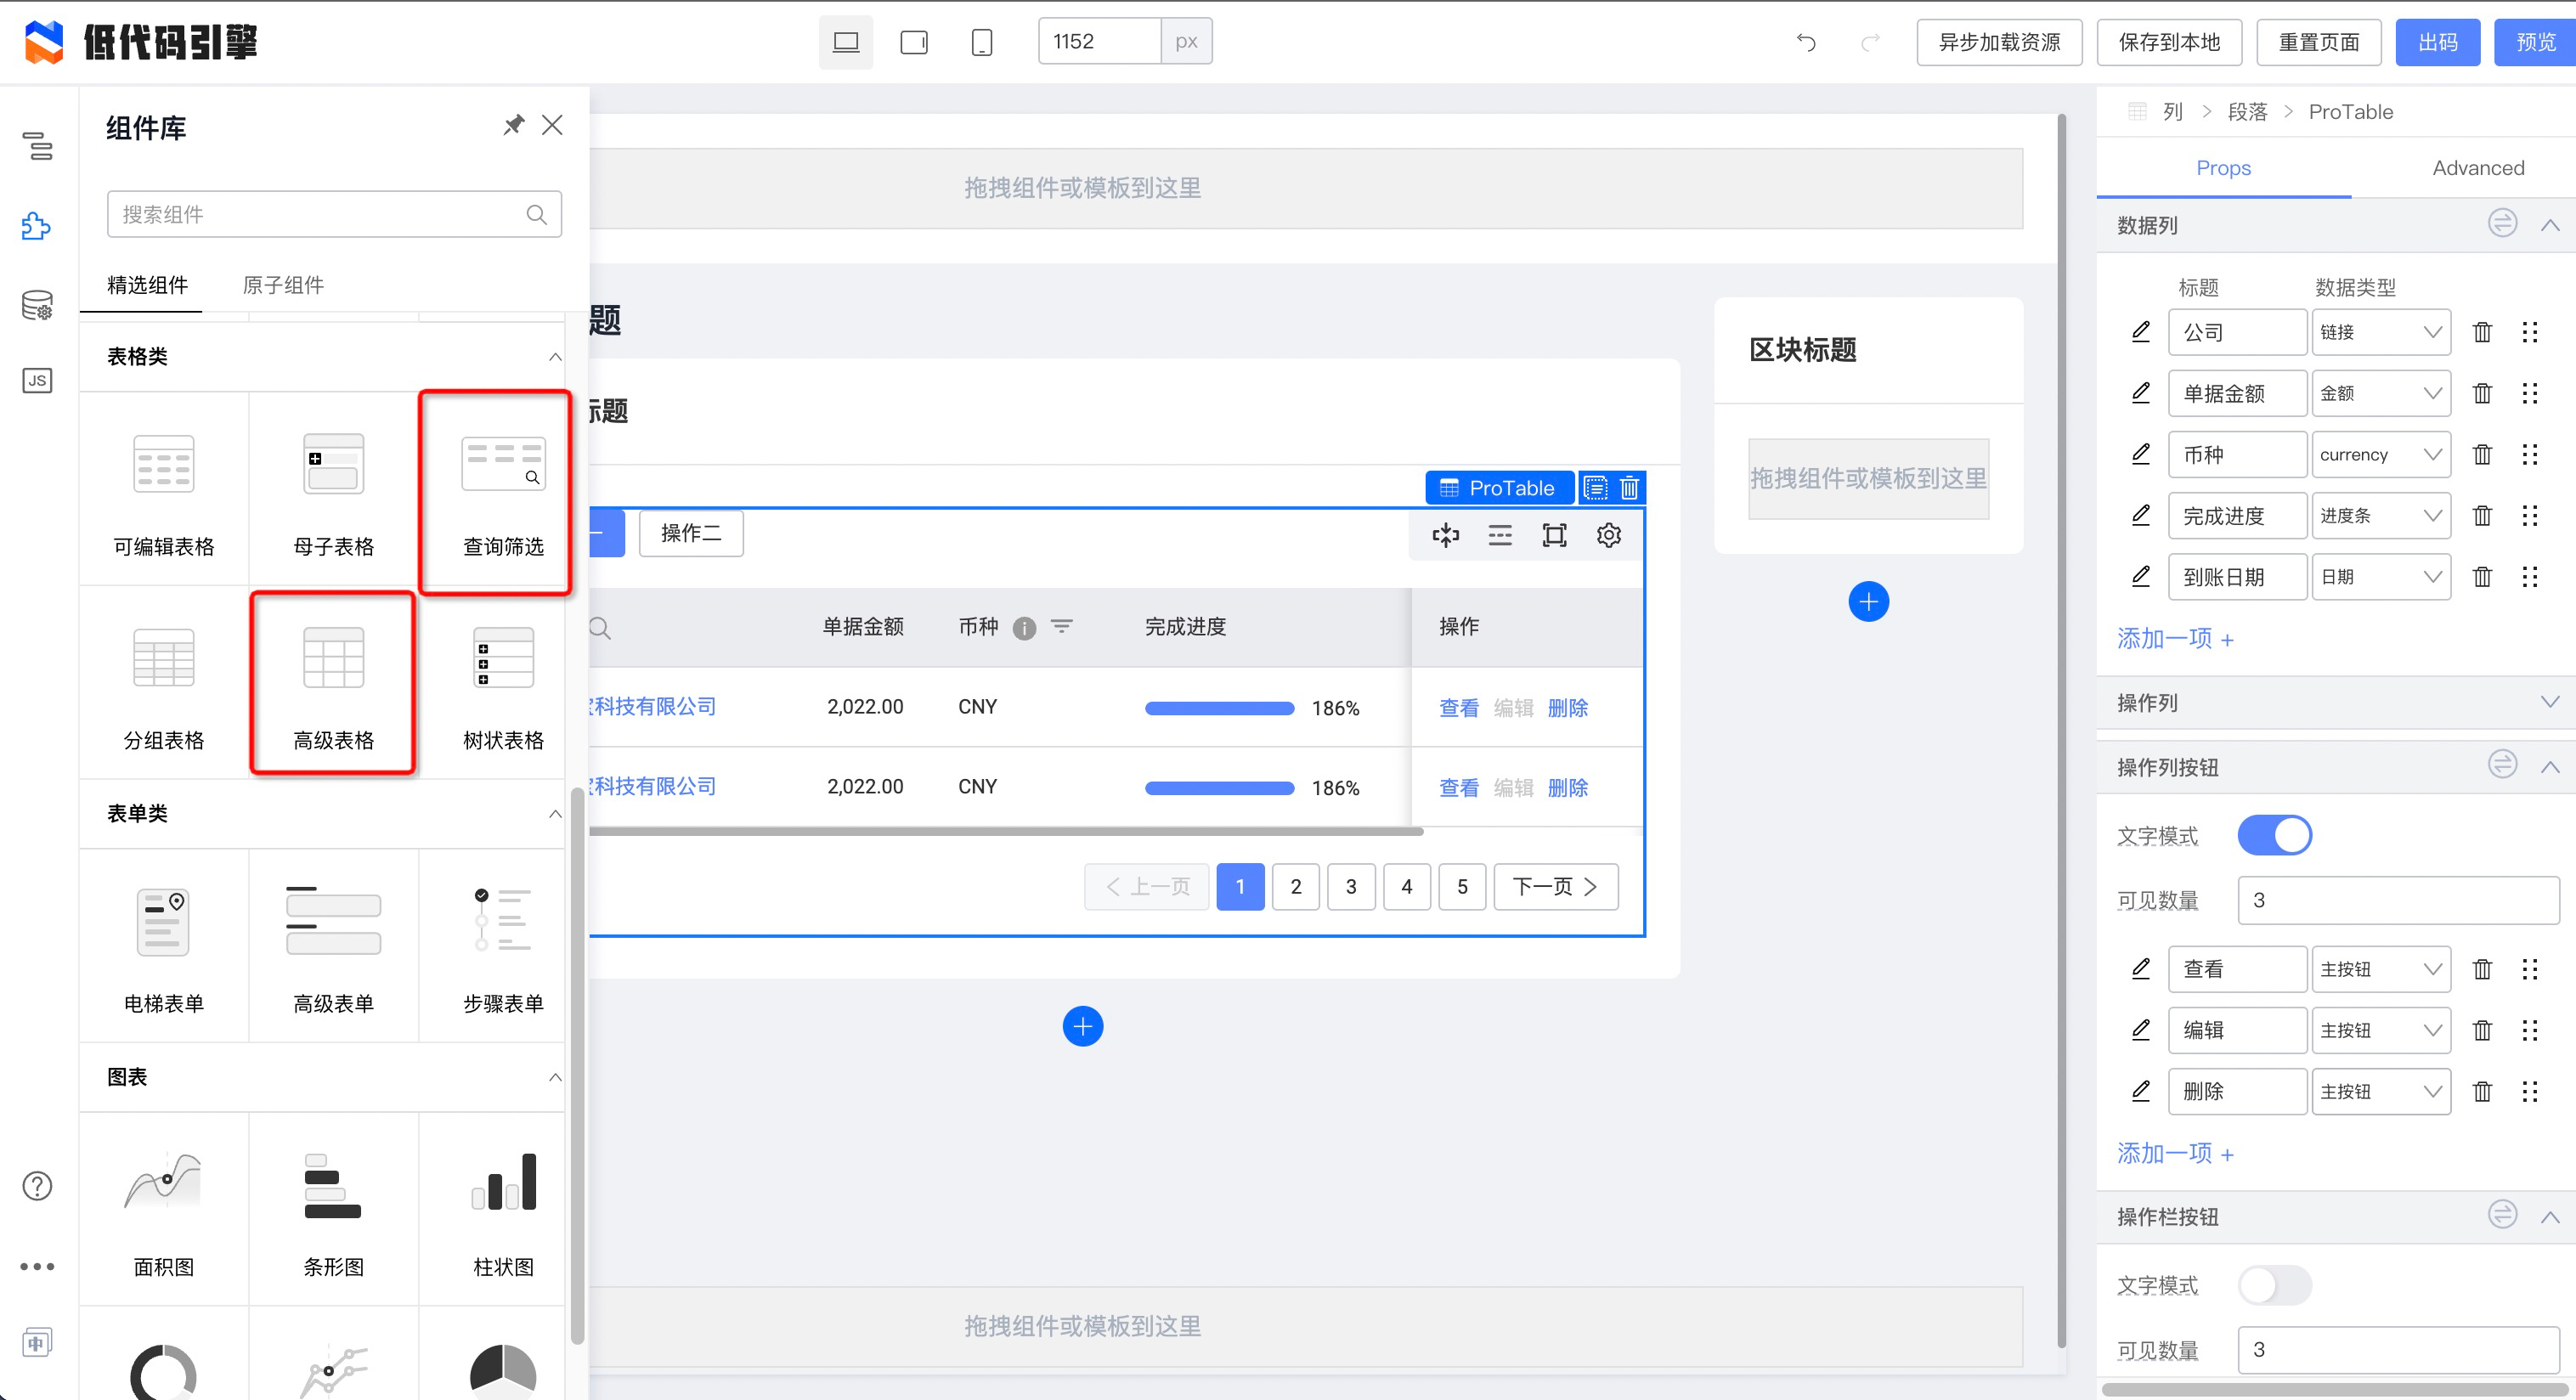
Drag them onto the canvas:

Configure components
Select the filter component you dropped and configure it:
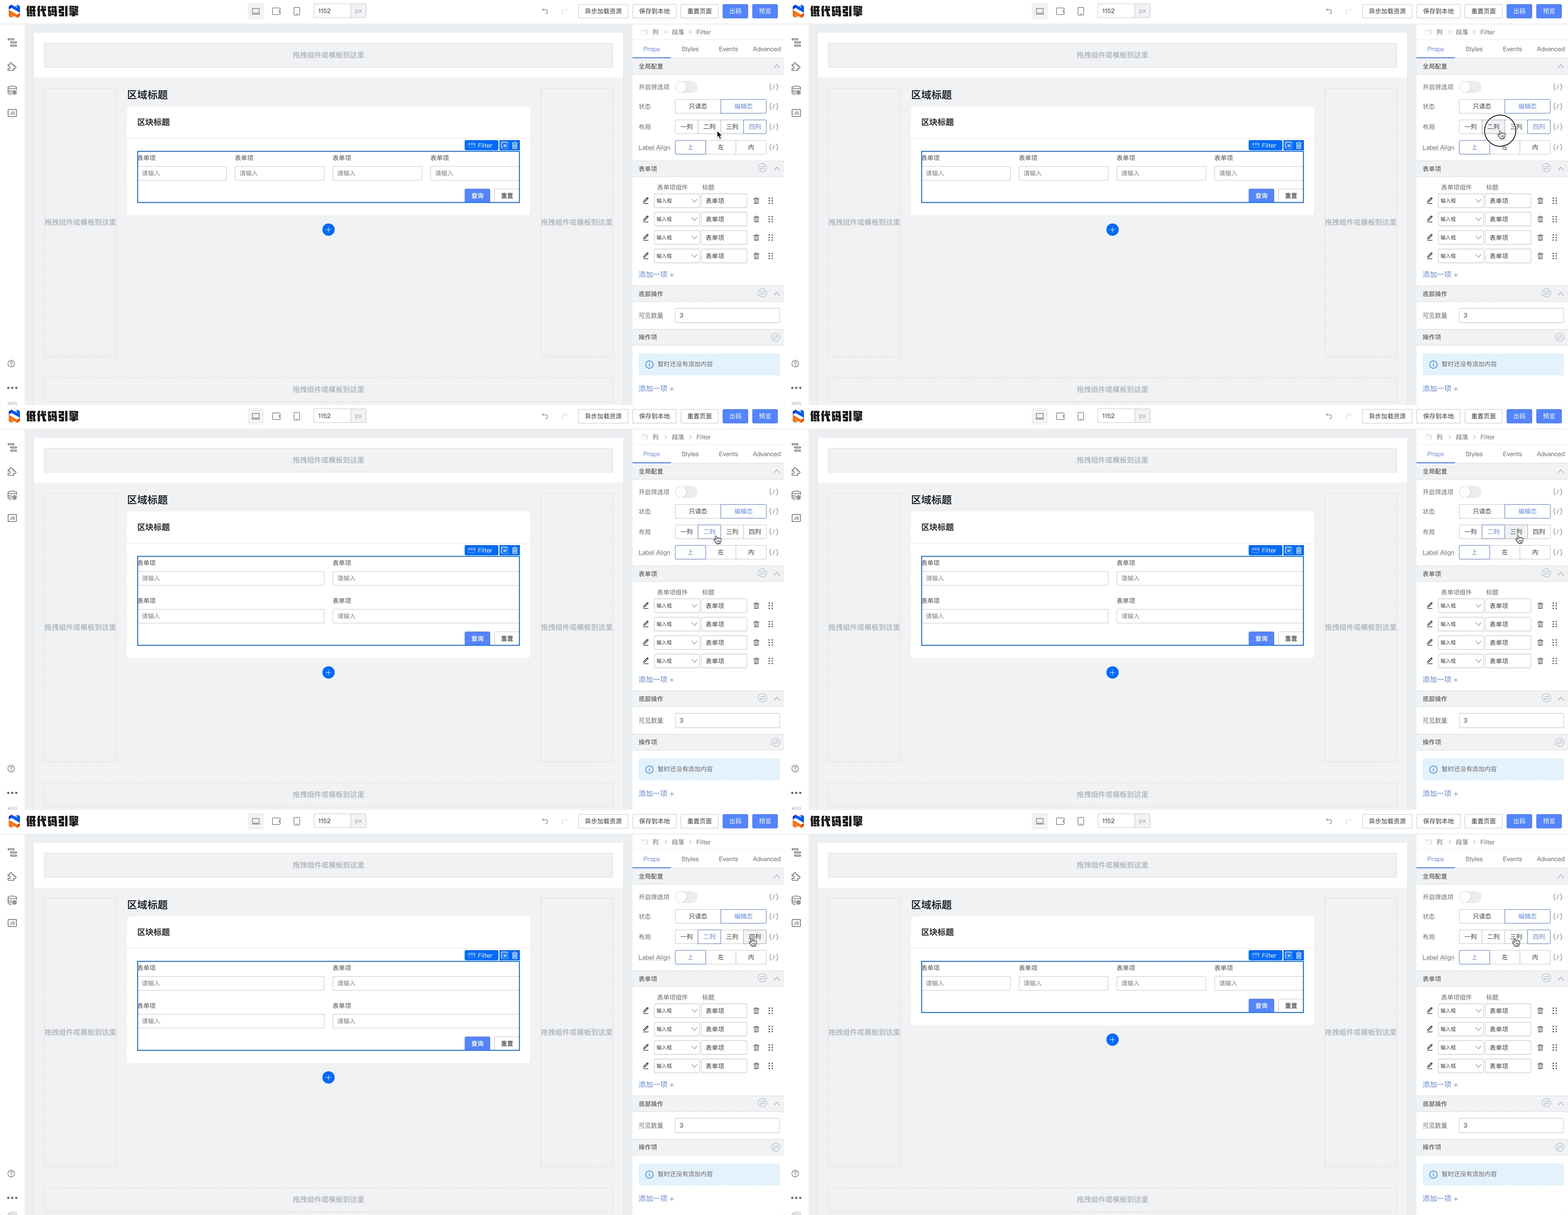
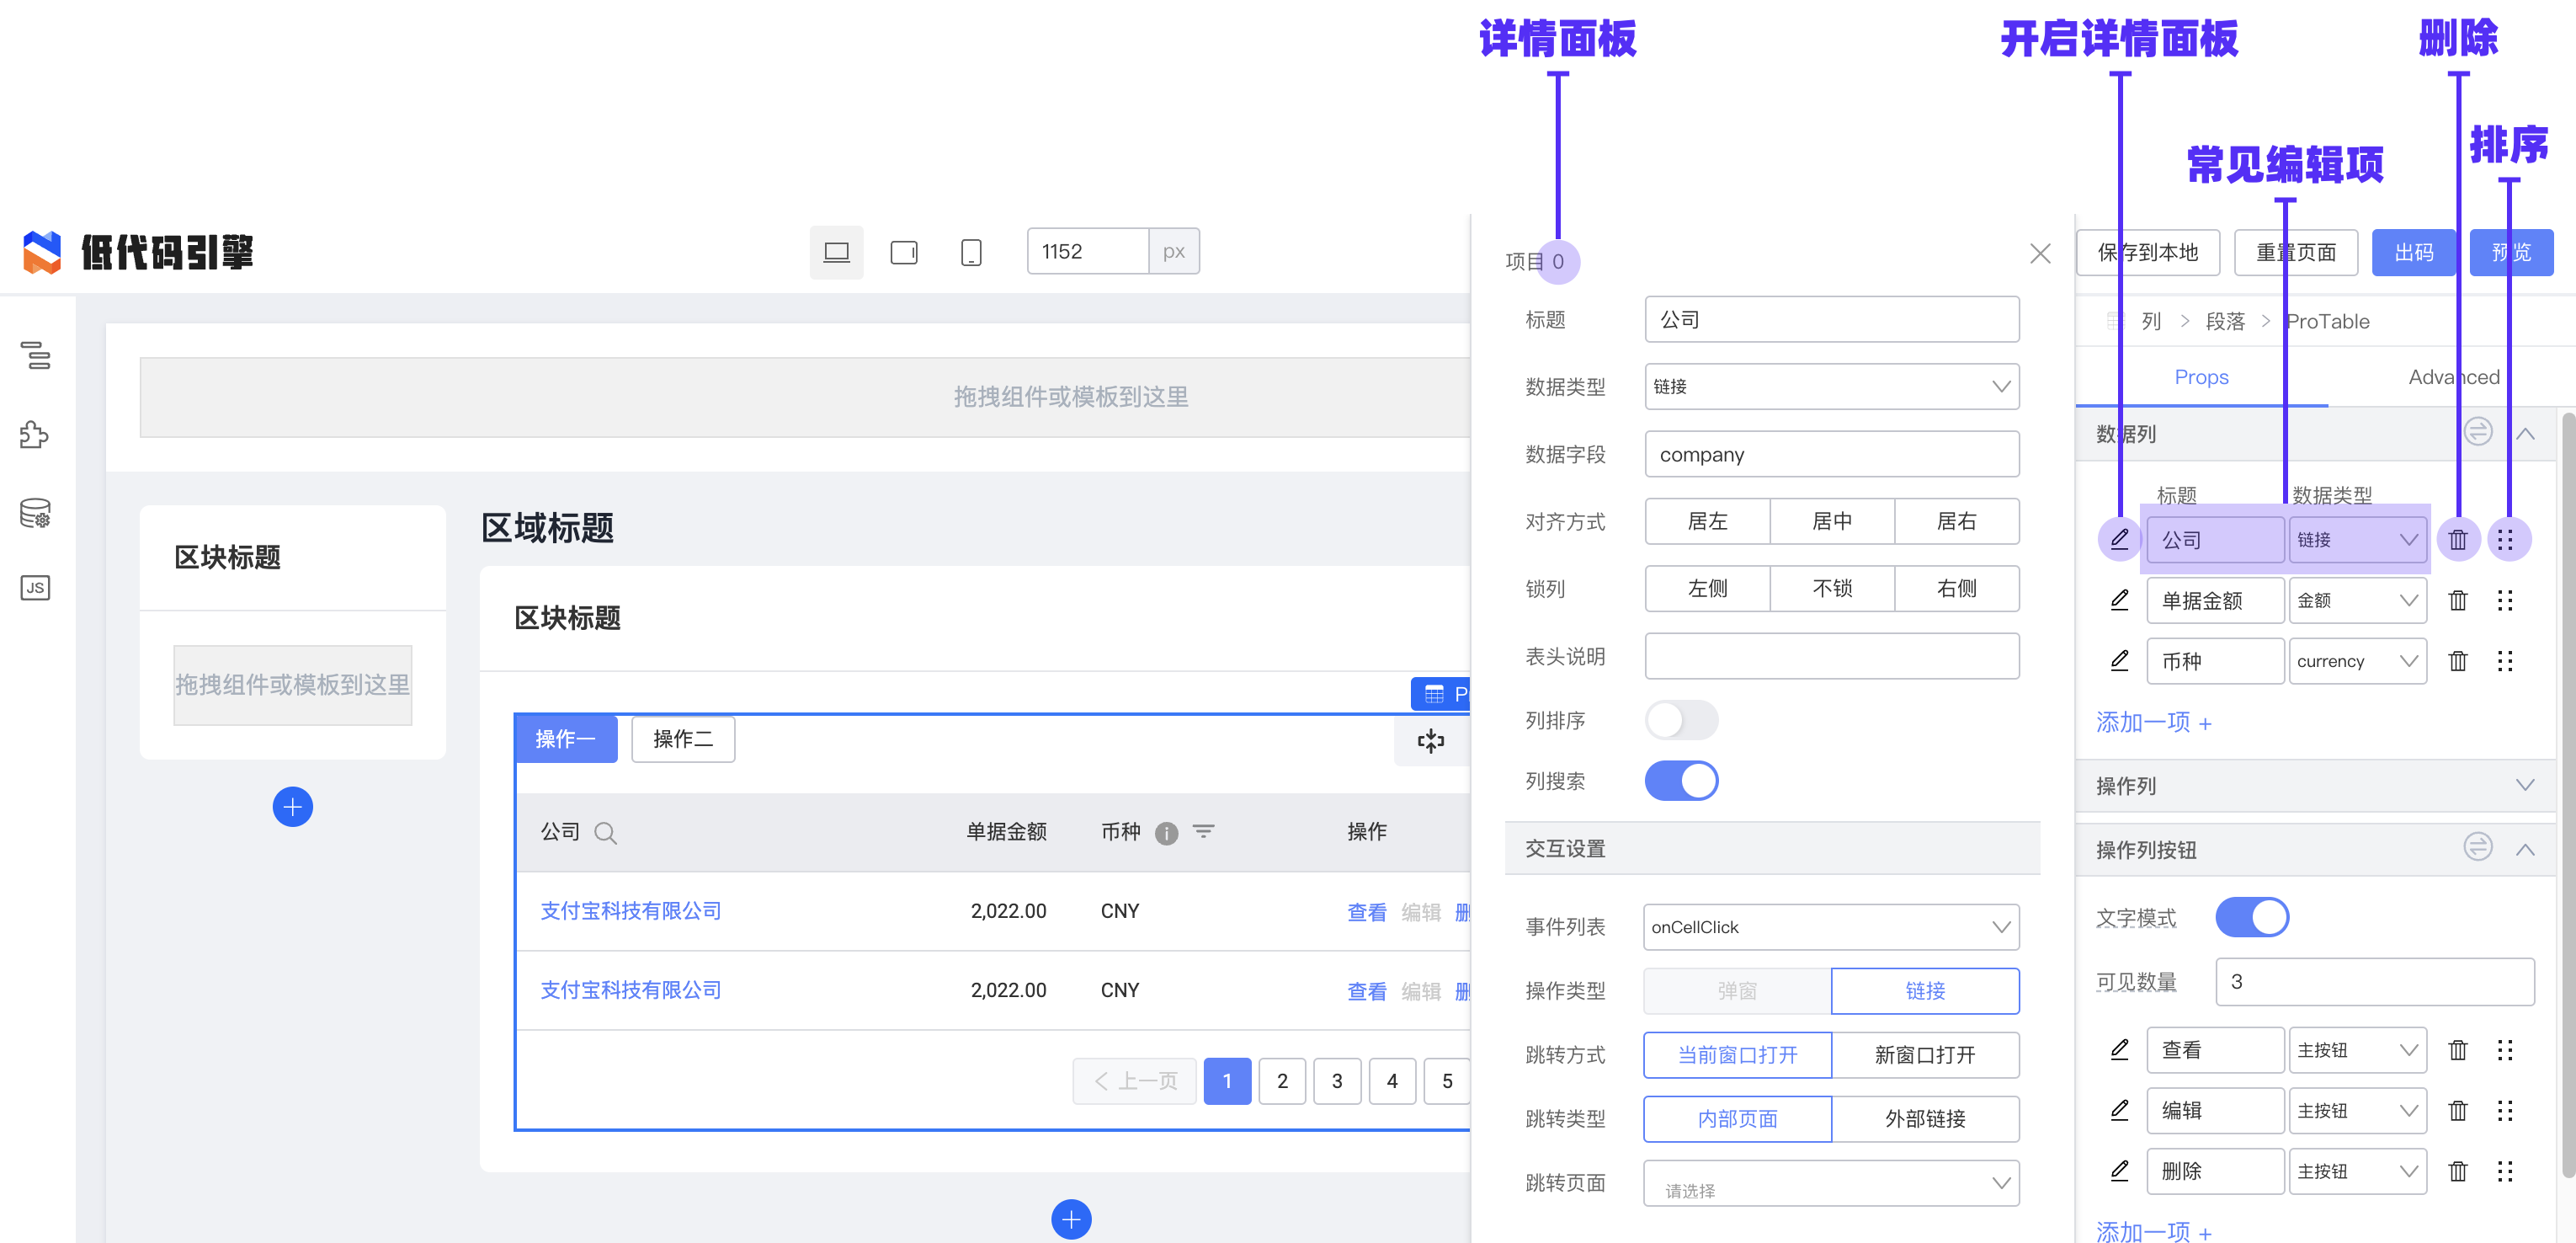
For array fields you can add/remove items, edit fields, and reorder.
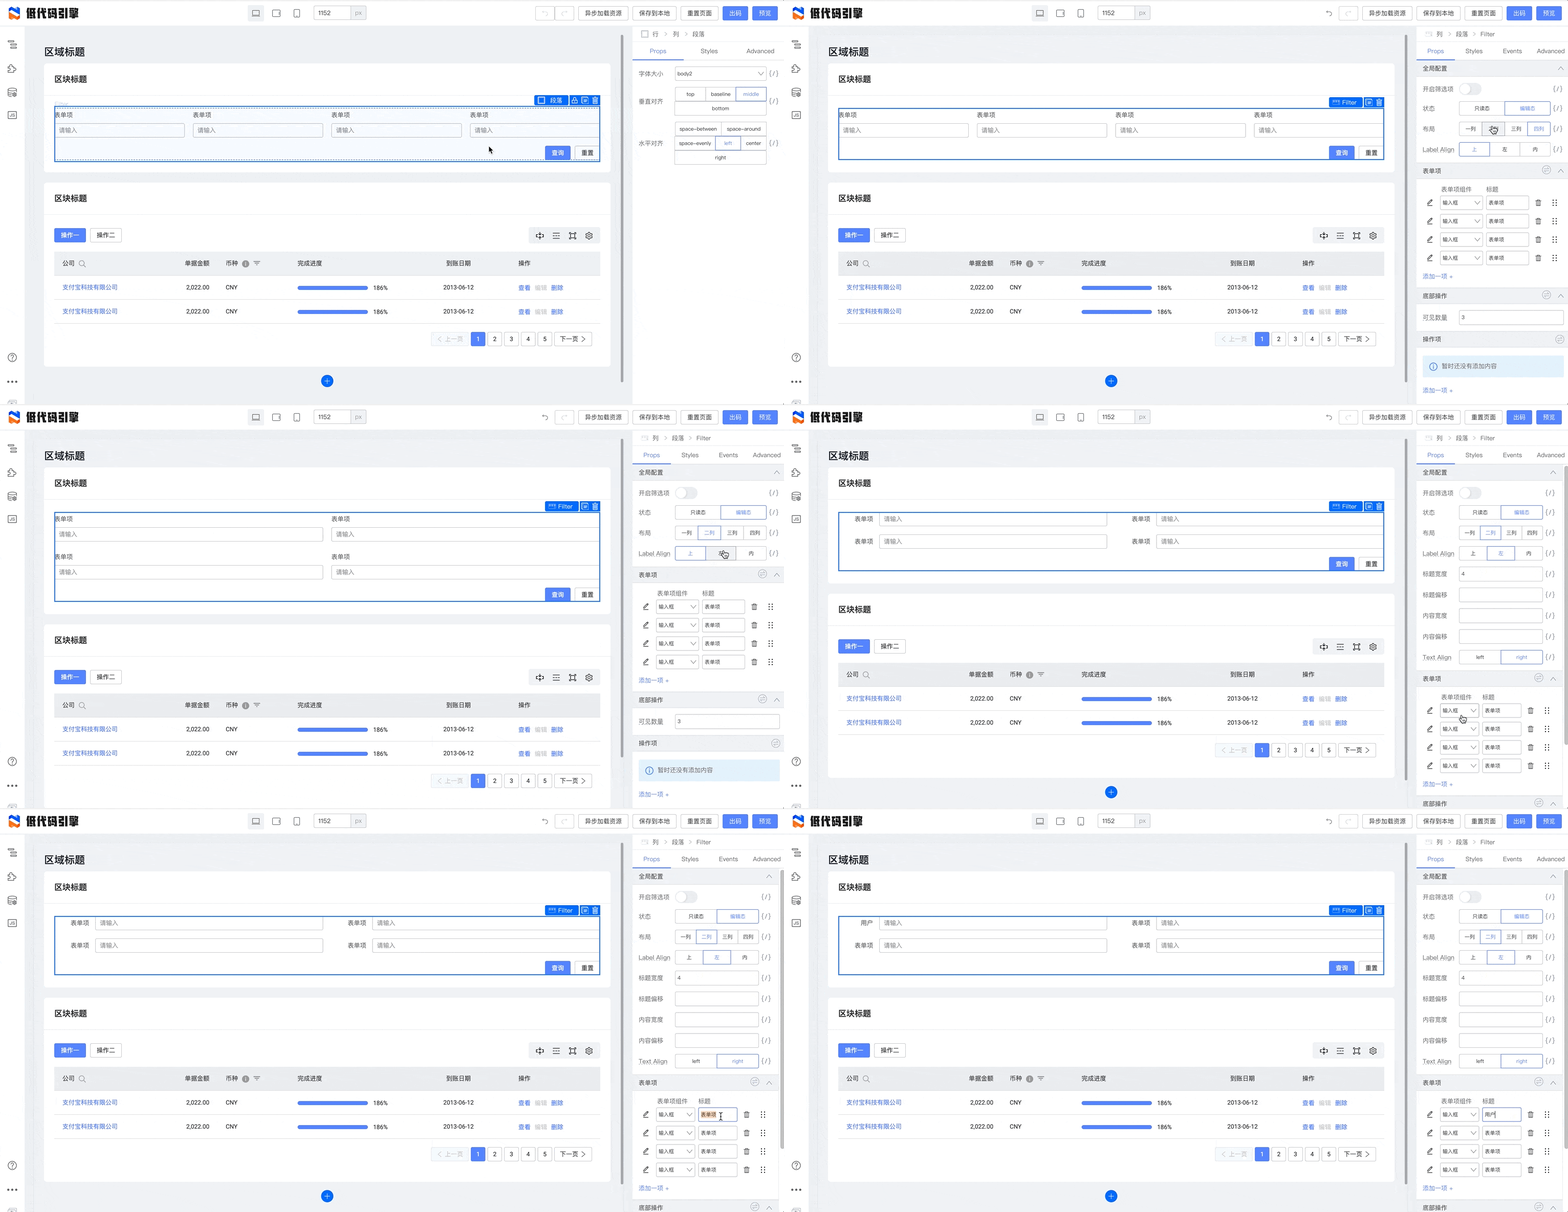
With that, you can configure a typical filter:
Bind data
Low-code pages need dynamic data. Use the source panel on the left to define state and handlers:
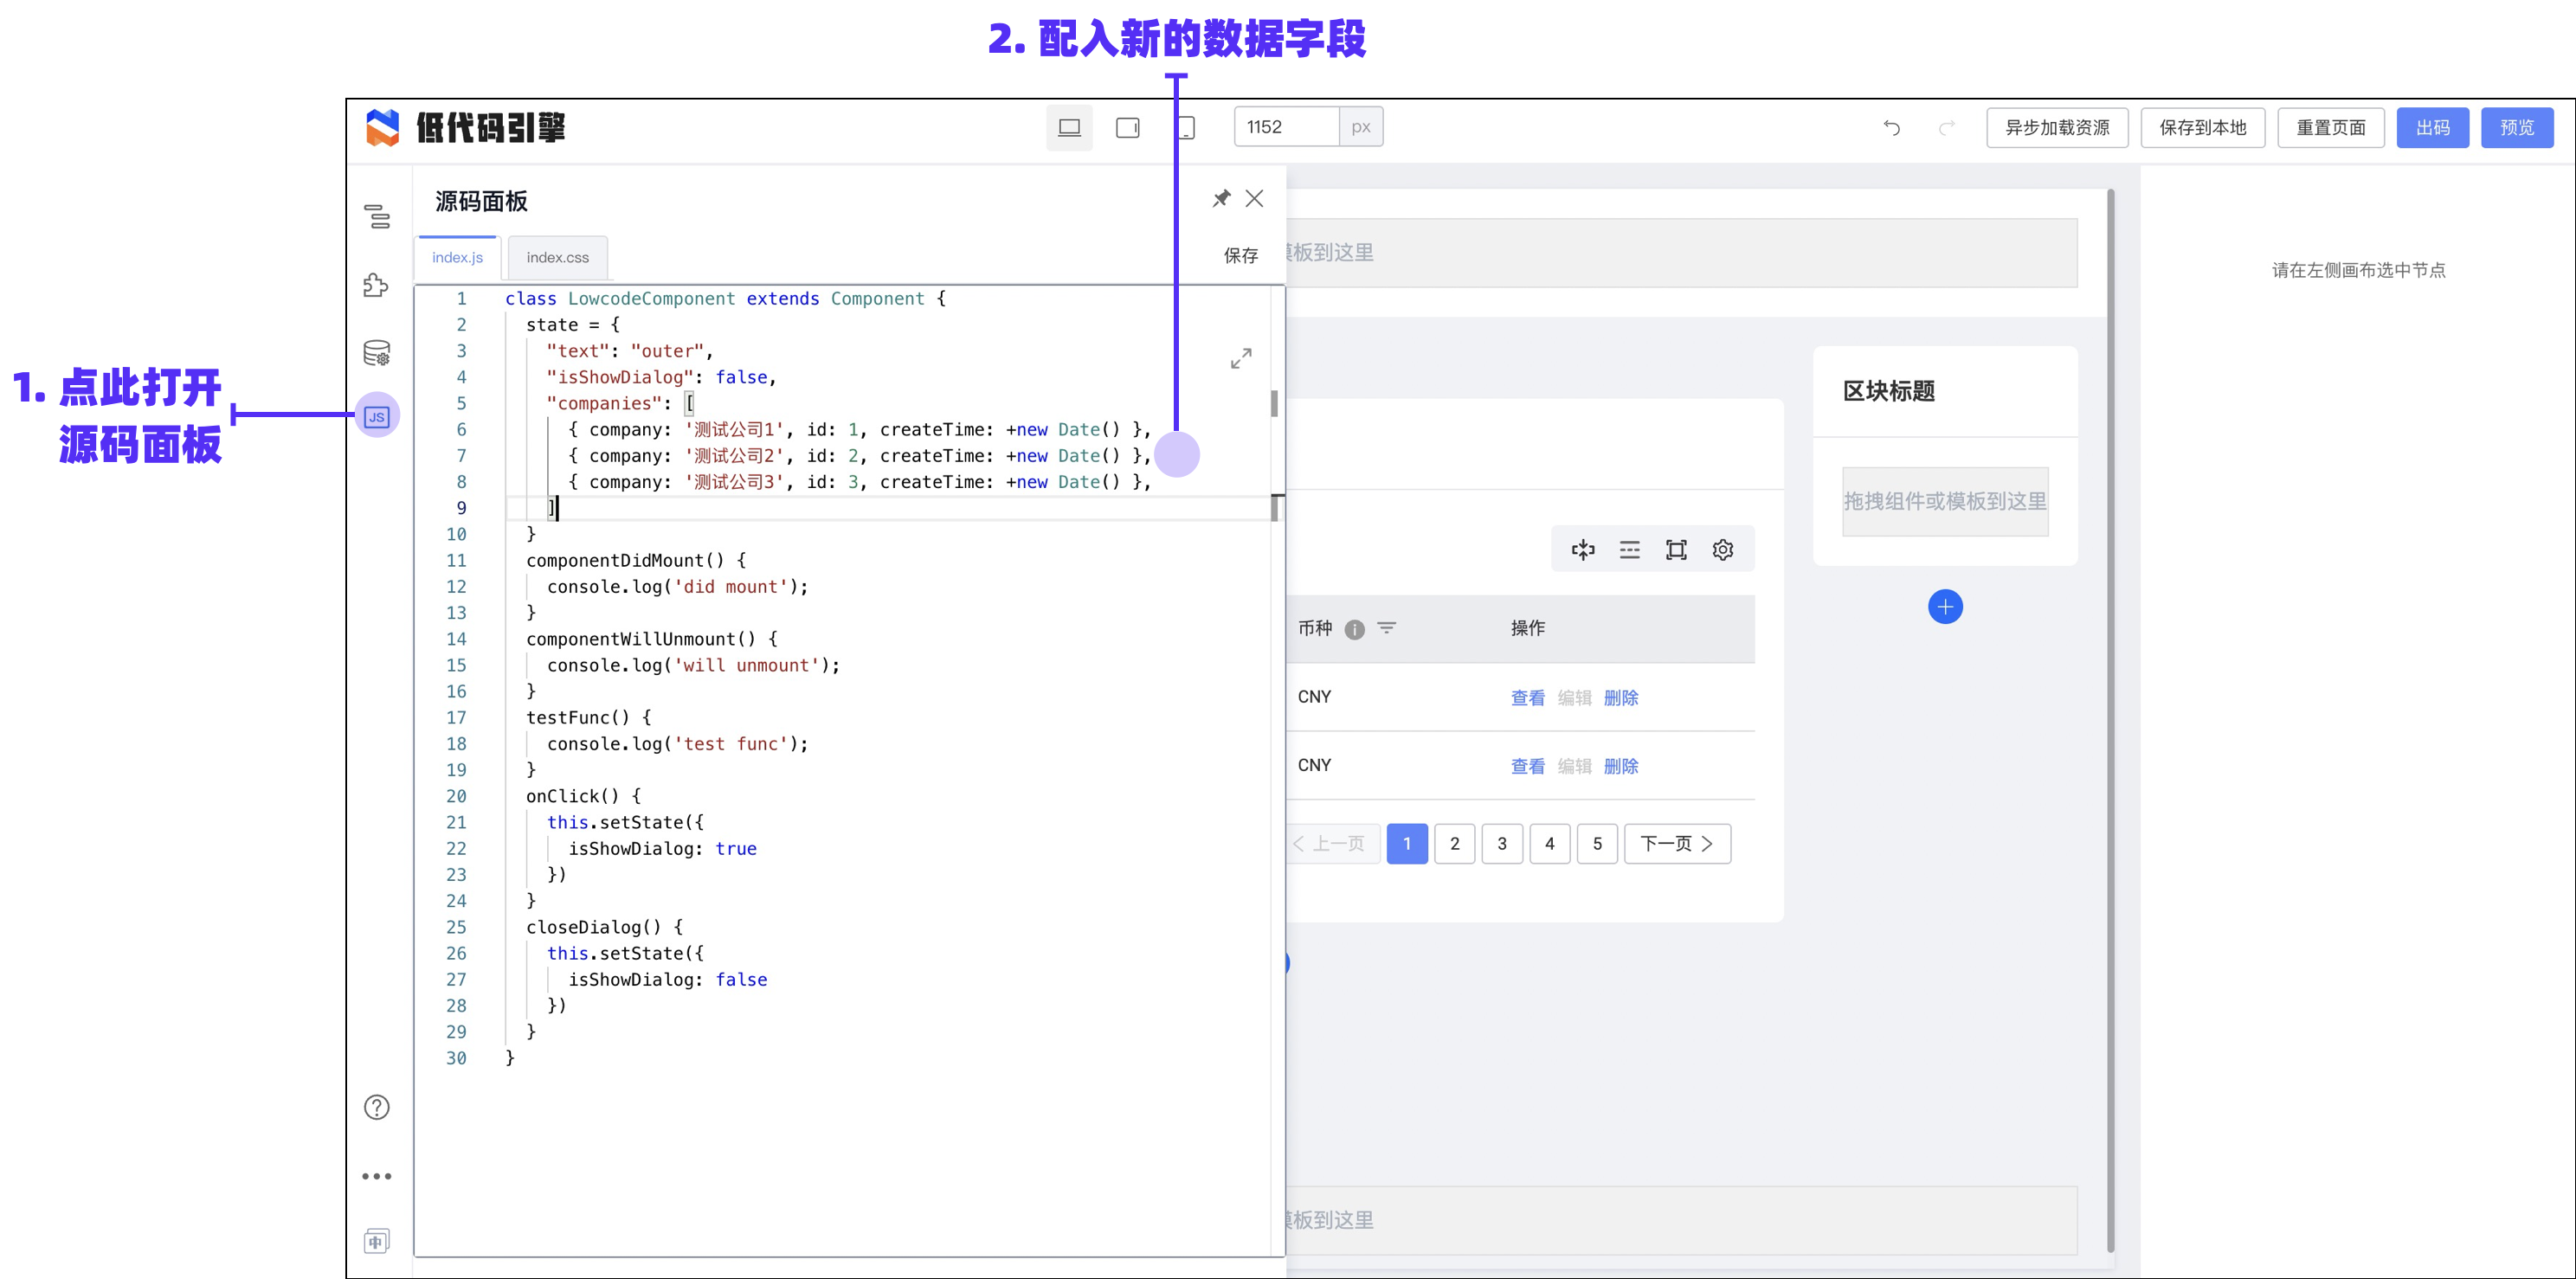
Add sample data to state:
    "companies": [
      { company: 'Test Company1', id: 1, createTime: +new Date() },
      { company: 'Test Company2', id: 2, createTime: +new Date() },
      { company: 'Test Company3', id: 3, createTime: +new Date() },
    ]
Then bind it to component props:
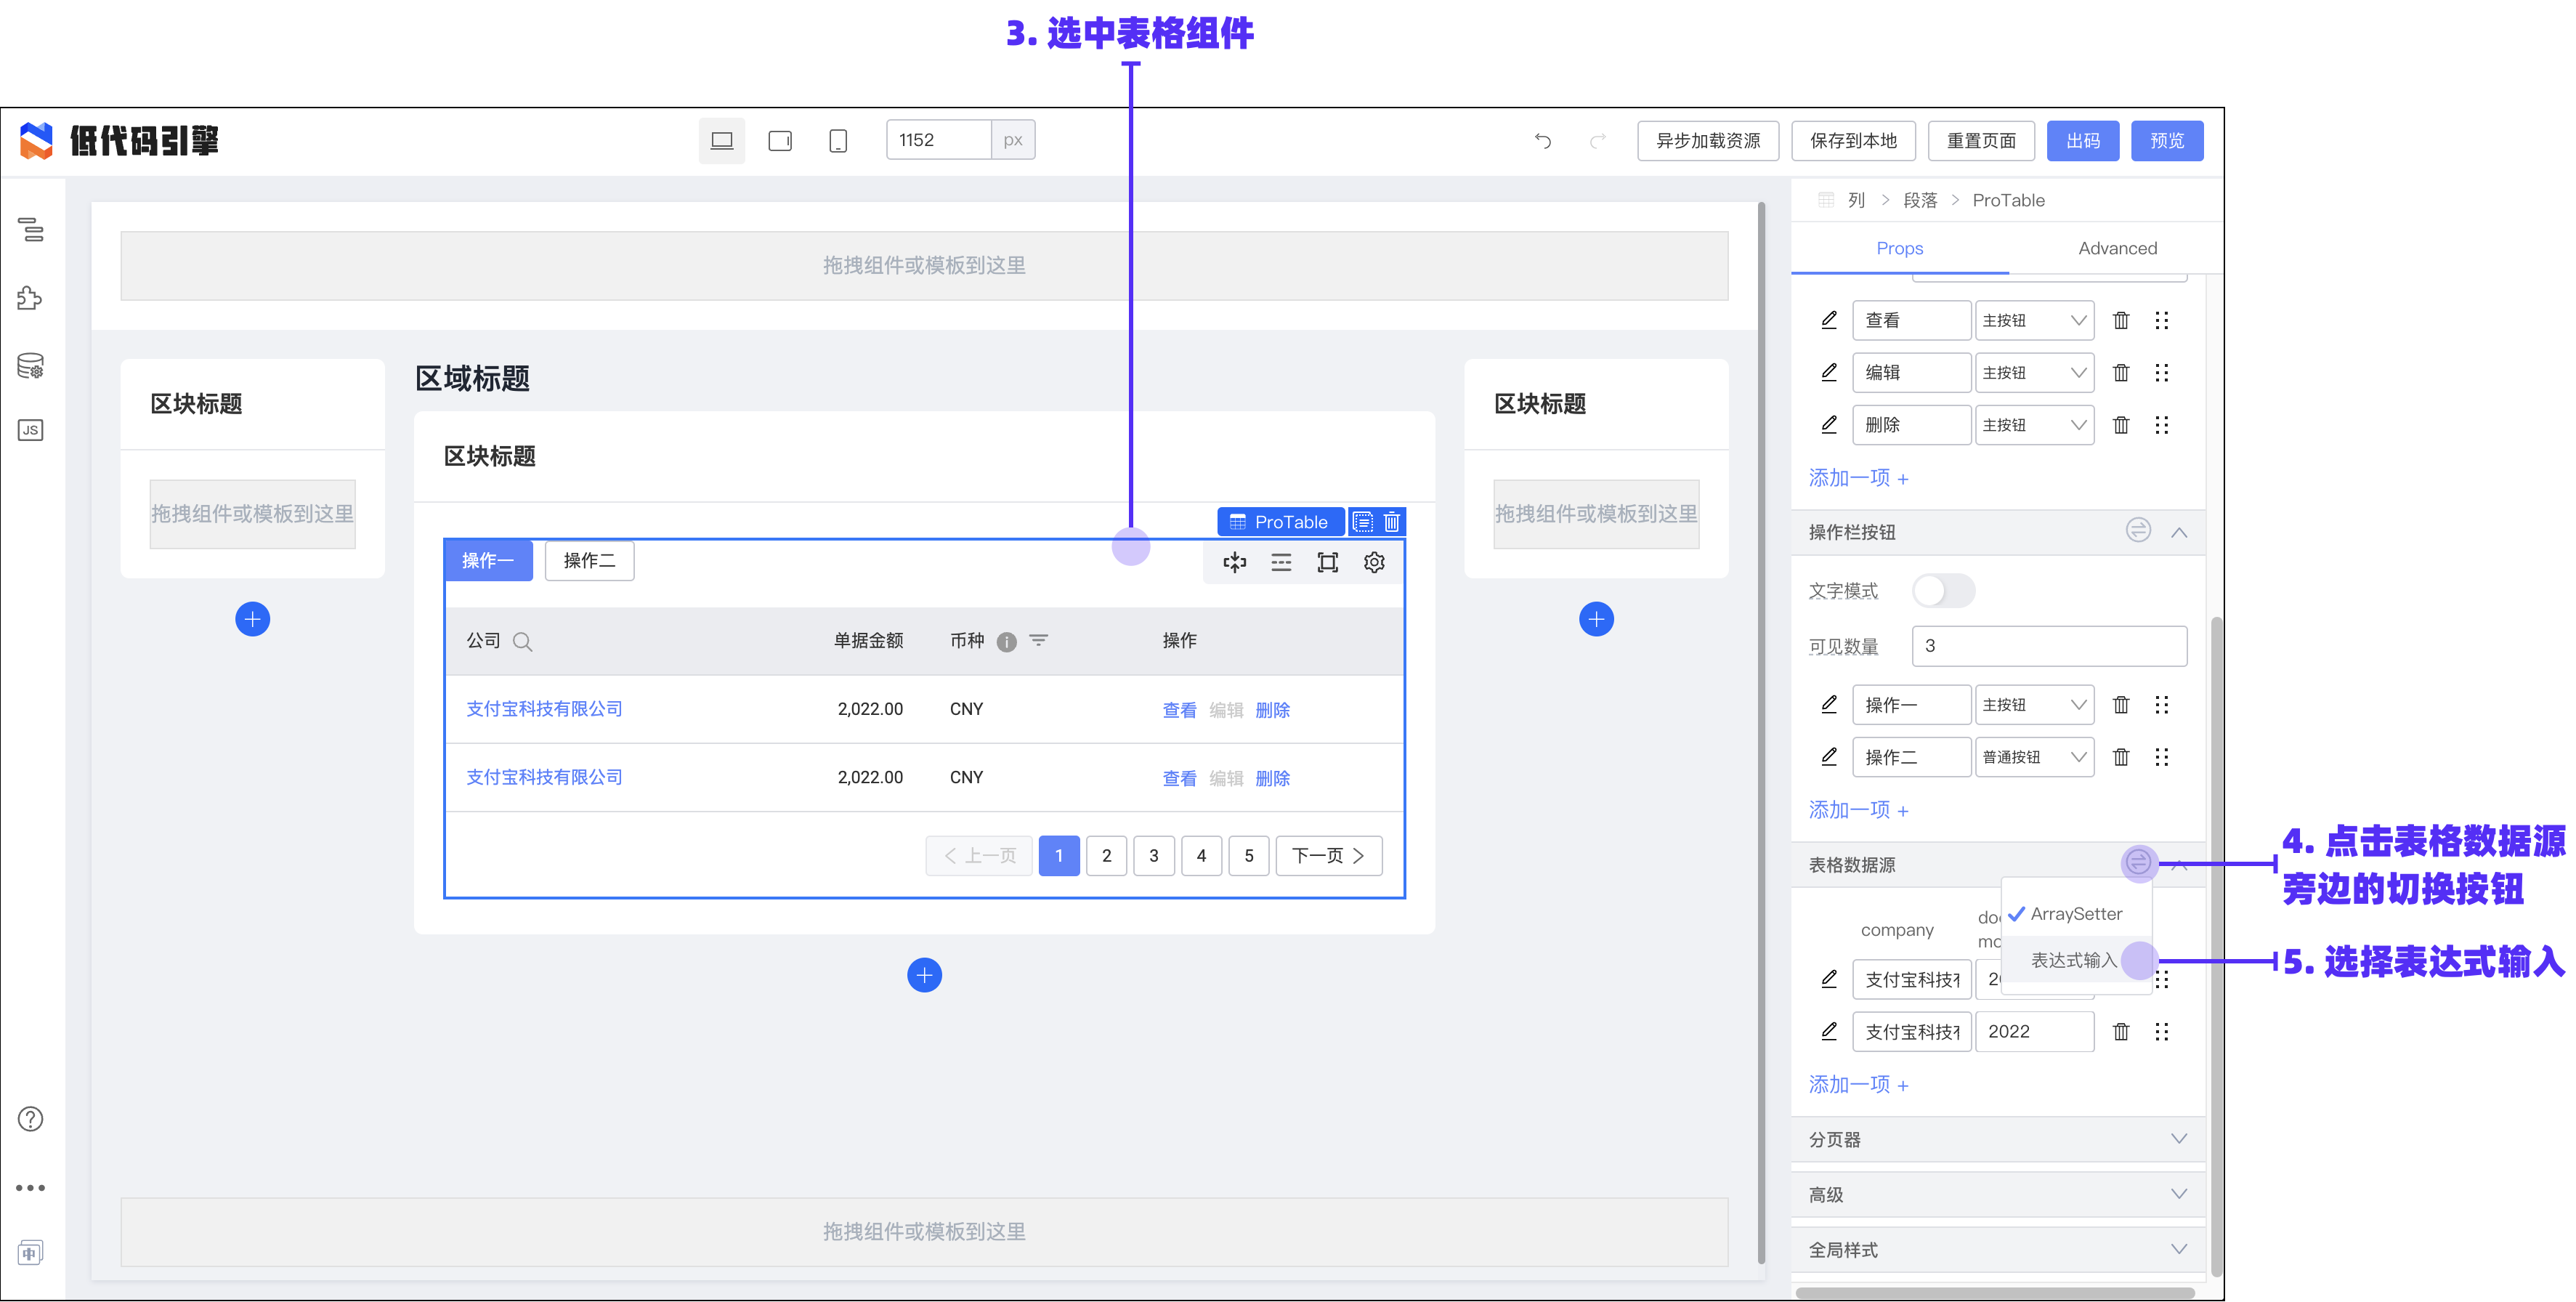
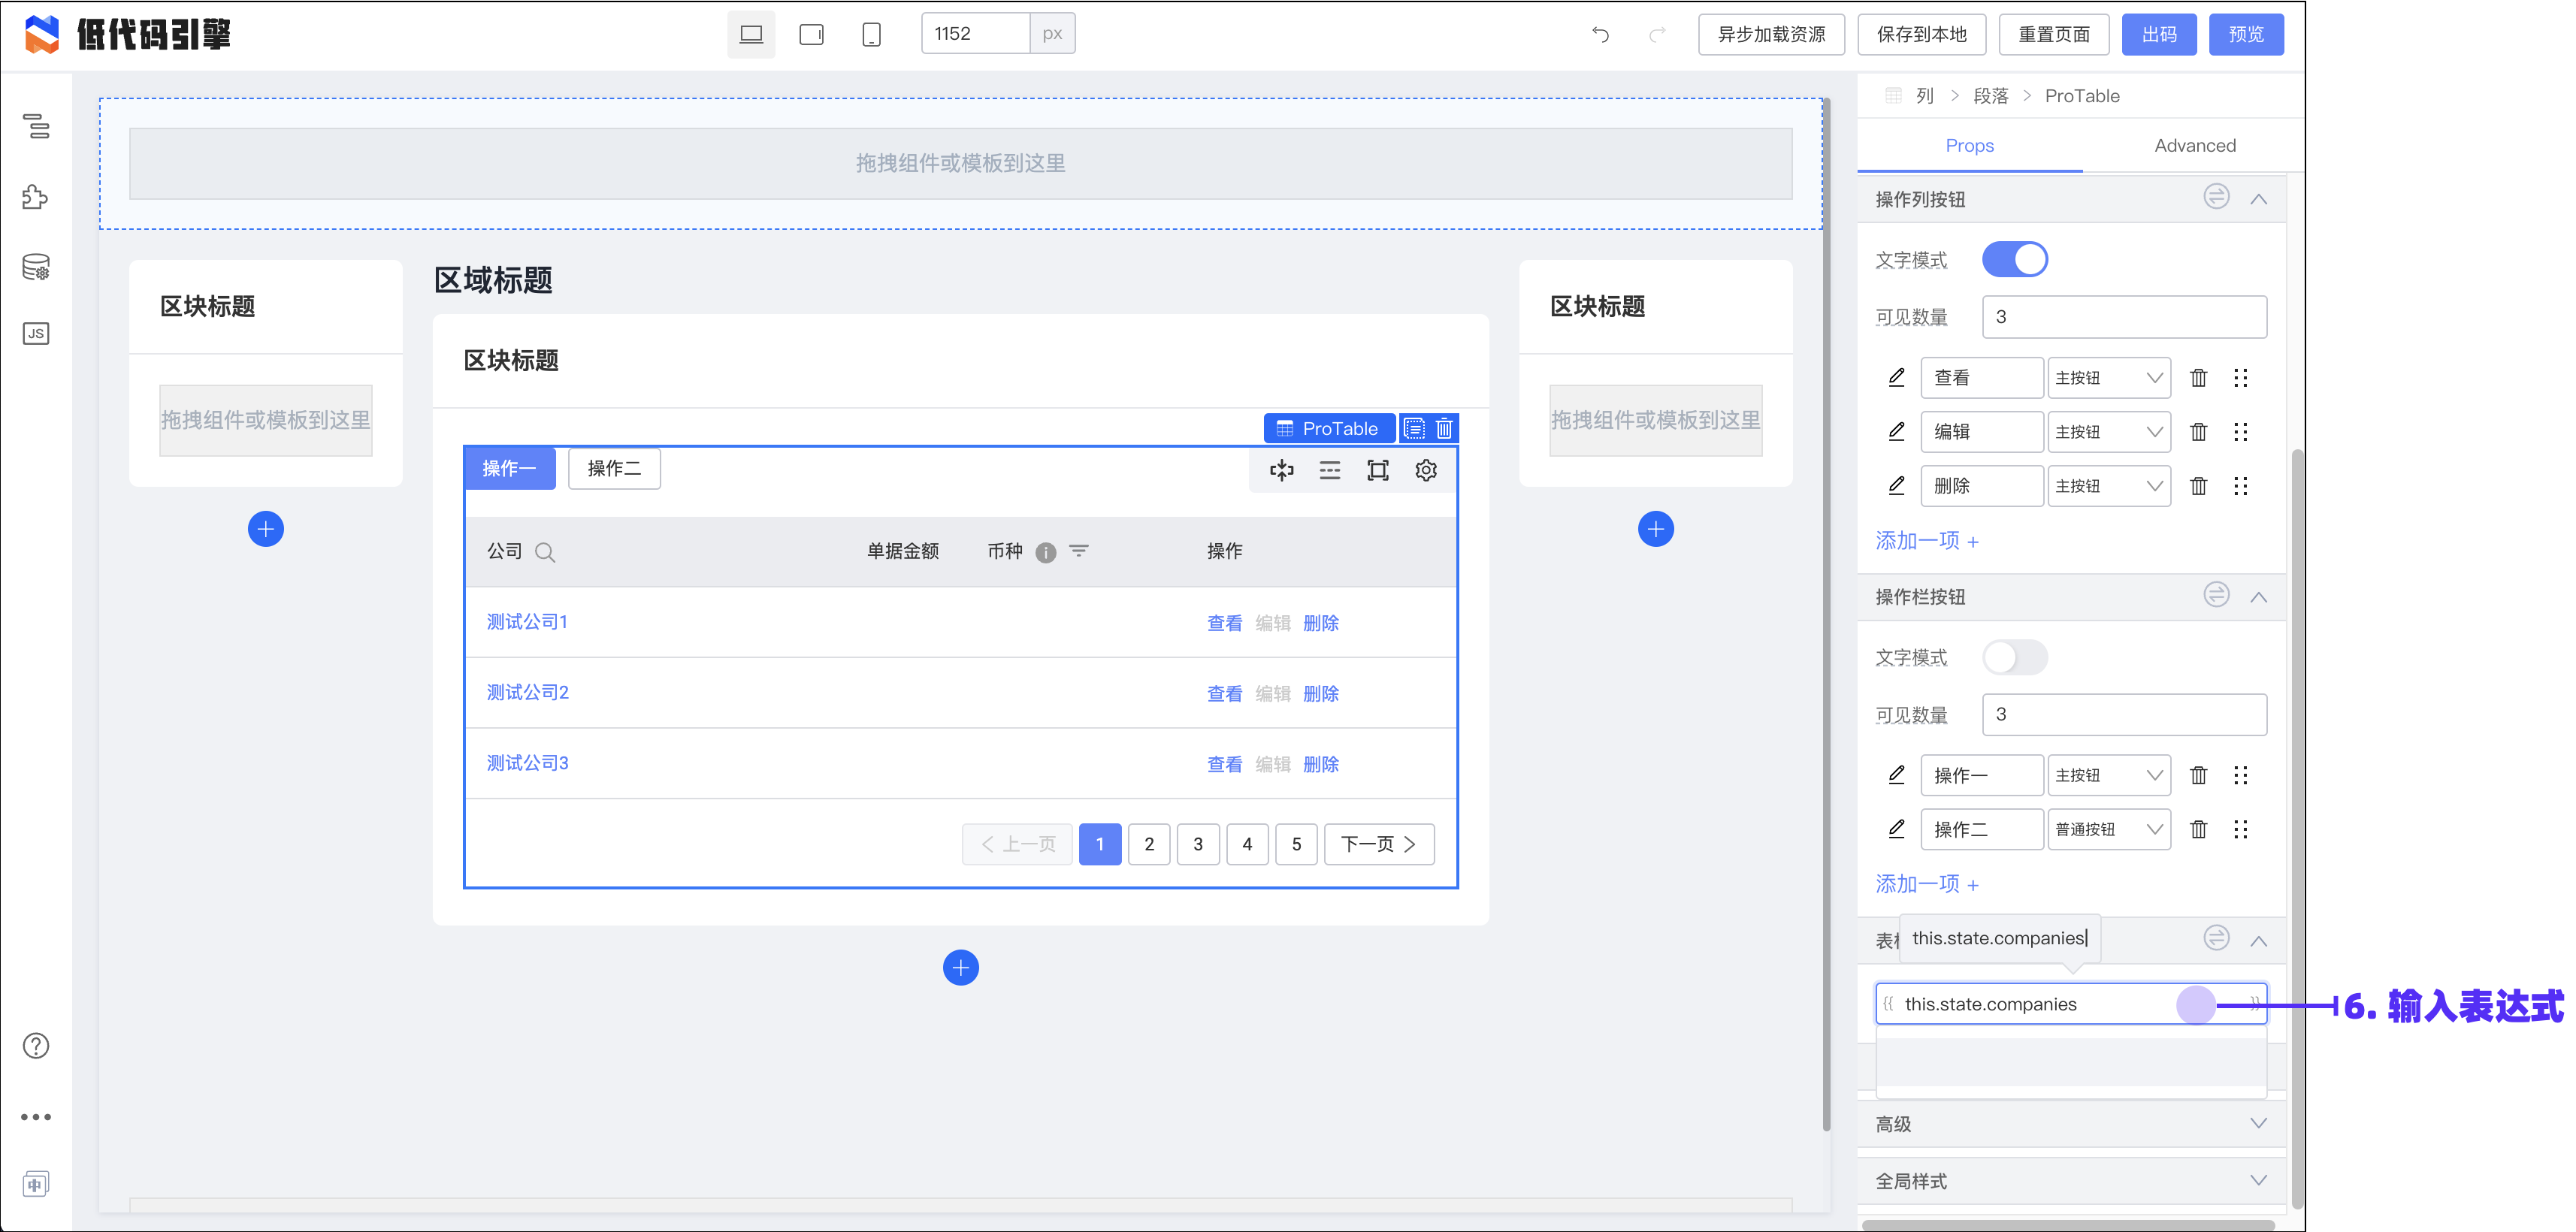
Use an expression:
this.state.companies;
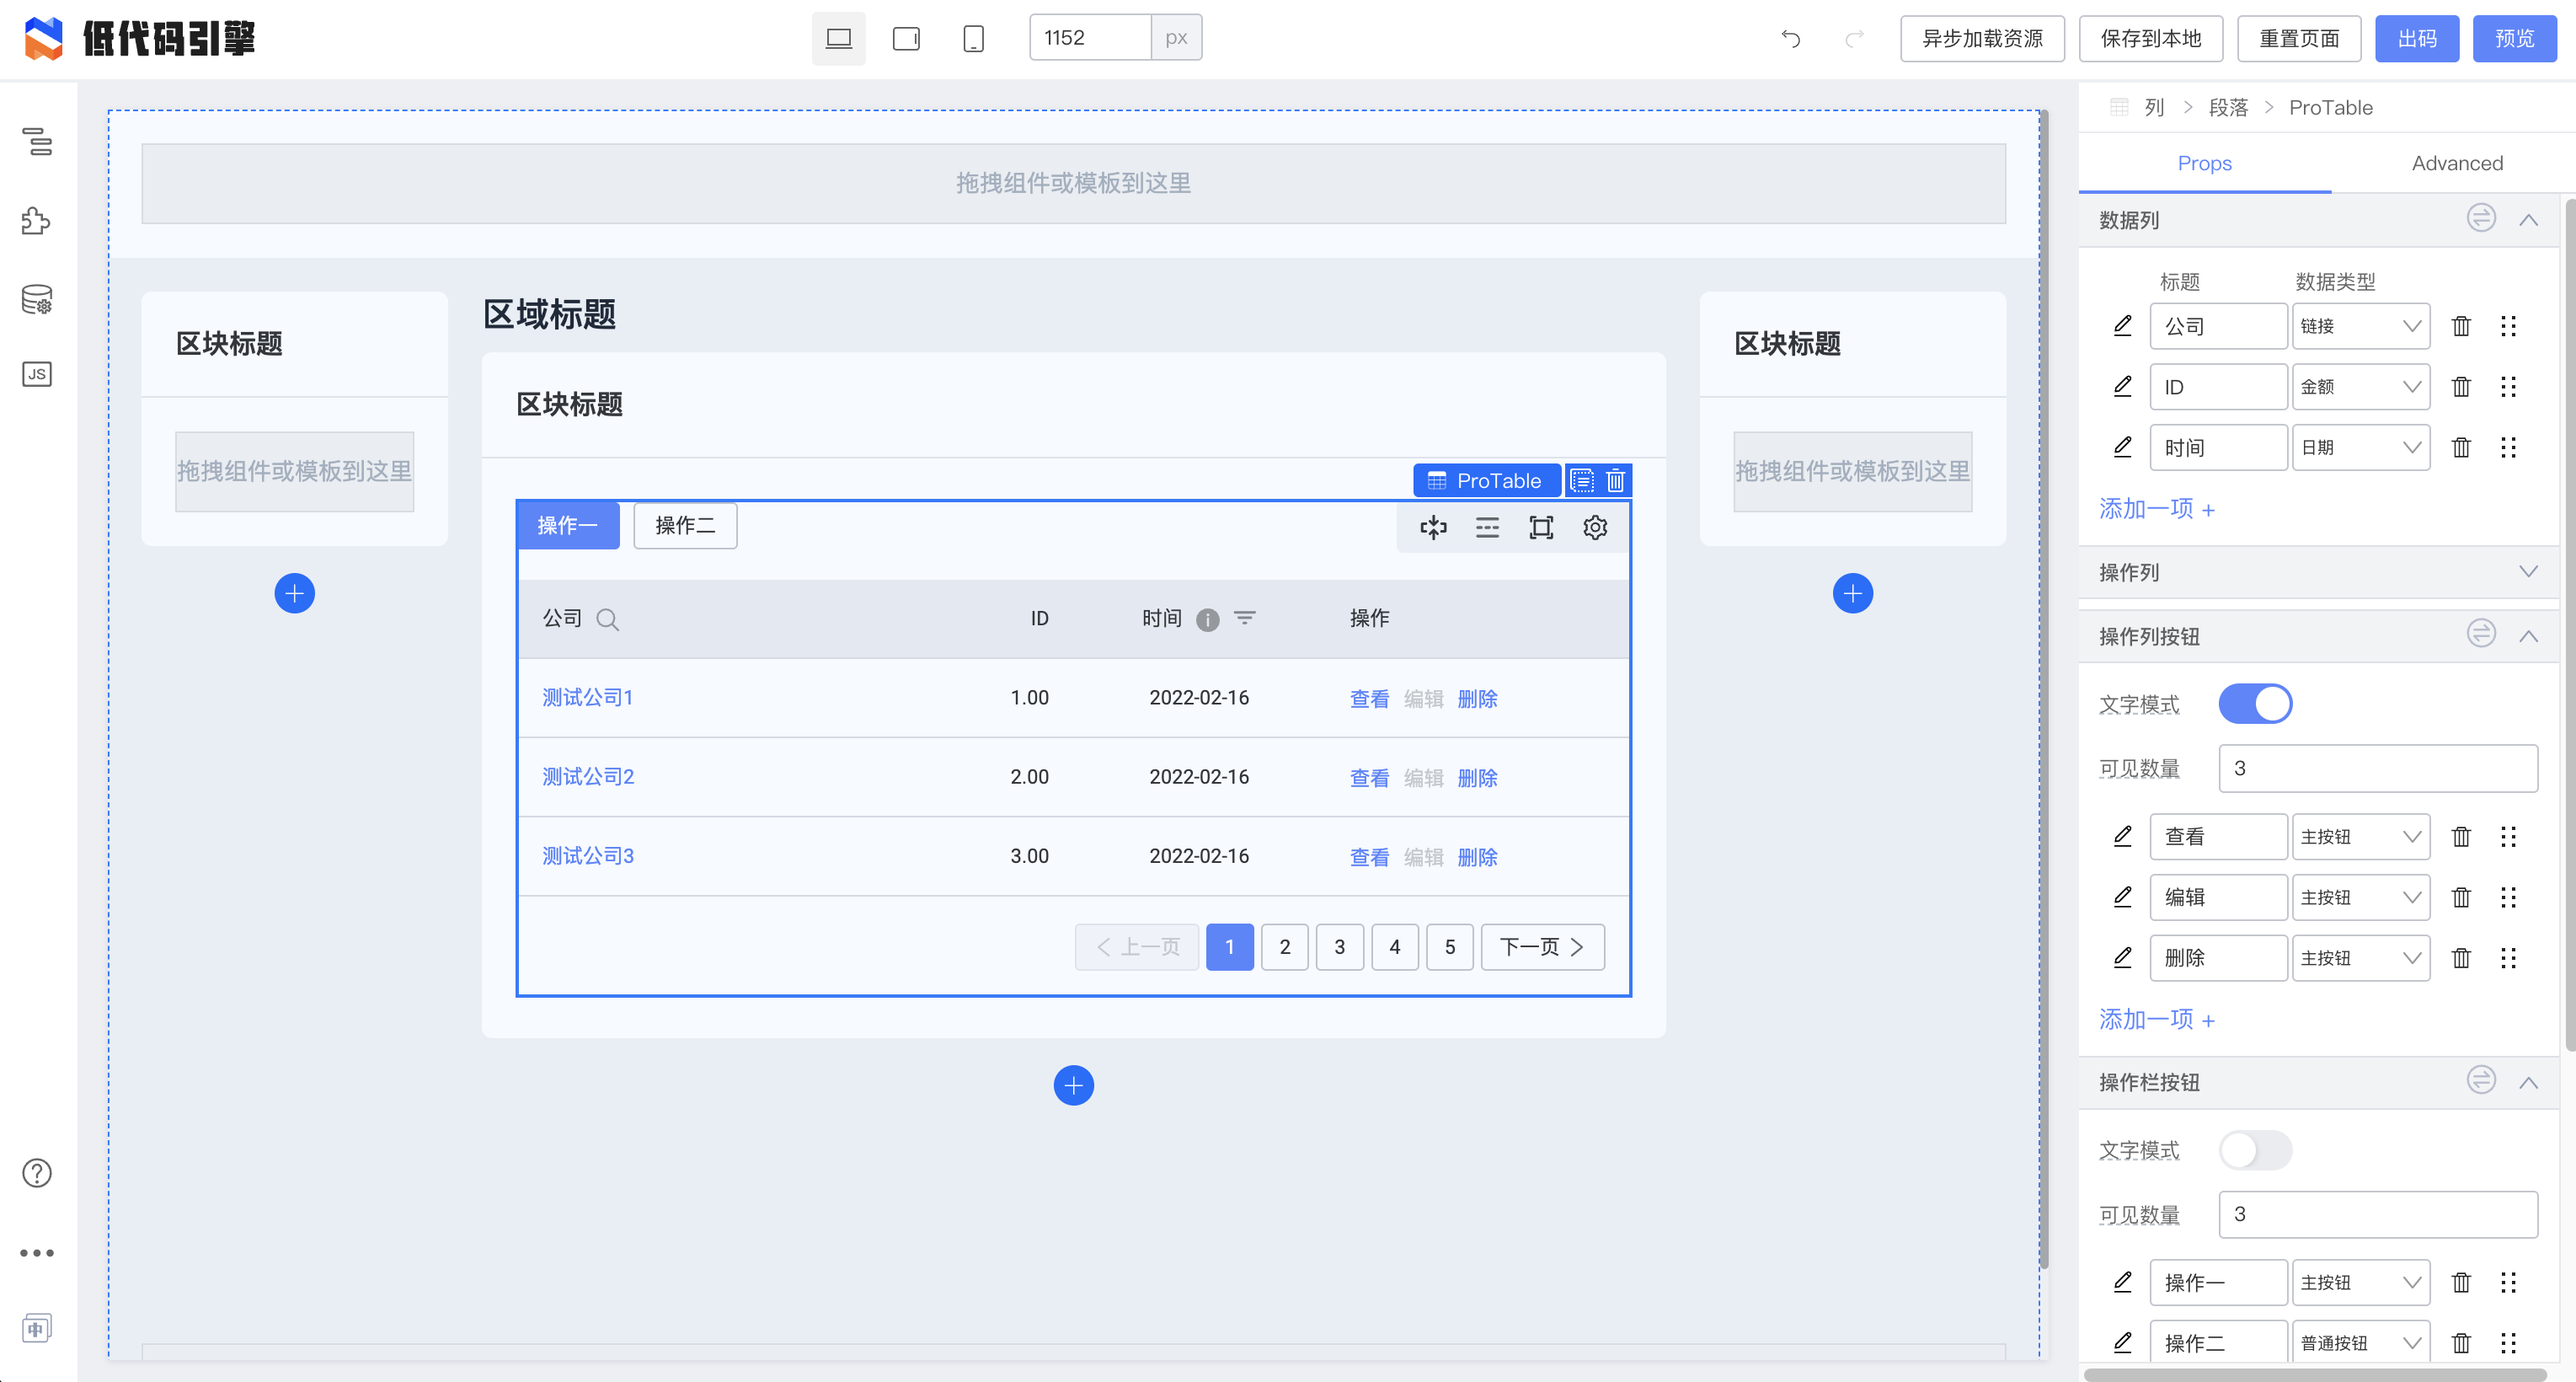
Together with component configuration, you can set up the table body:
Dynamic requests
Use a lifecycle method to fetch data. Example API: http://rap2api.taobao.org/app/mock/250089/testCompanies
class LowcodeComponent extends Component {
  state = {
    text: 'outer',
    isShowDialog: false,
    loading: false,
    companies: [
      { company: 'Test Company 1', id: 1, createTime: +new Date() },
      { company: 'Test Company 2', id: 2, createTime: +new Date() },
      { company: 'Test Company 3', id: 3, createTime: +new Date() },
    ],
  };
  componentDidMount() {
    this.setState({ loading: true });
    window
      .fetch('http://rap2api.taobao.org/app/mock/250089/testCompanies')
      .then((res) => res.json())
      .then((companies) => {
        this.setState({
          companies,
        });
      })
      .catch((err) => console.error(err))
      .then(() => {
        this.setState({ loading: false });
      });
  }
}
On componentDidMount, the page requests the API and updates loading and companies.
After save or closing the source panel, the code takes effect:
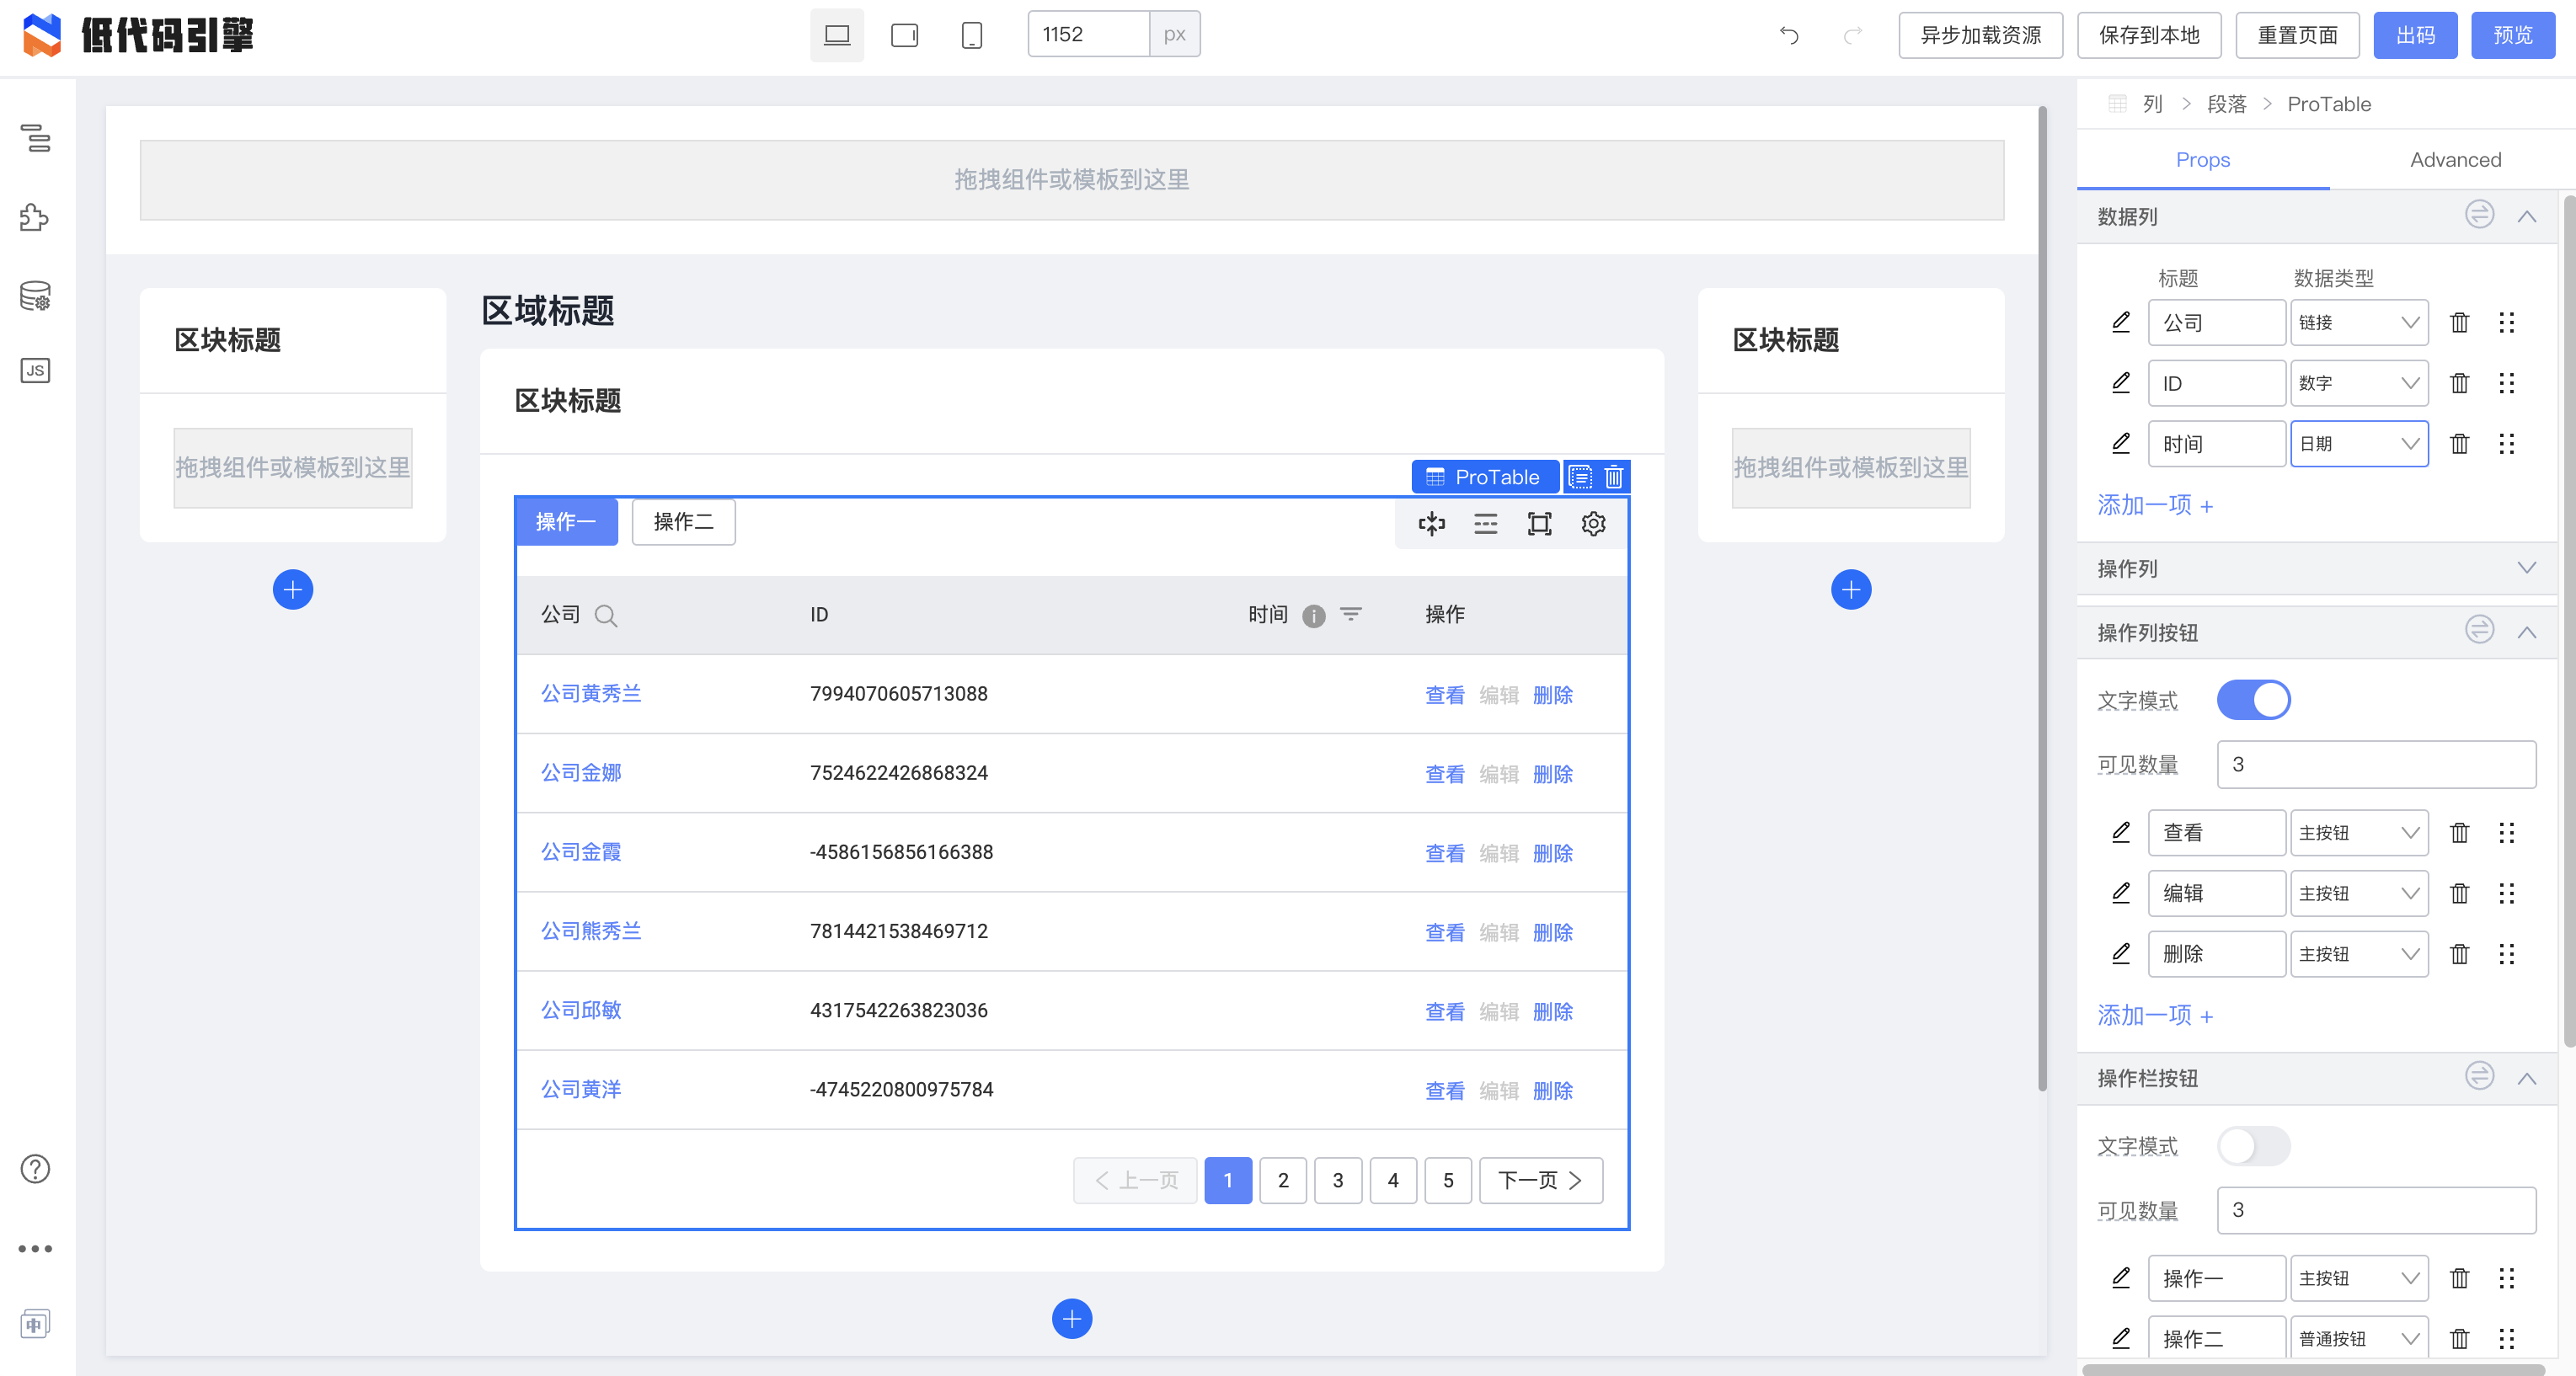
Configure slots
Bind loading to the loading indicator:
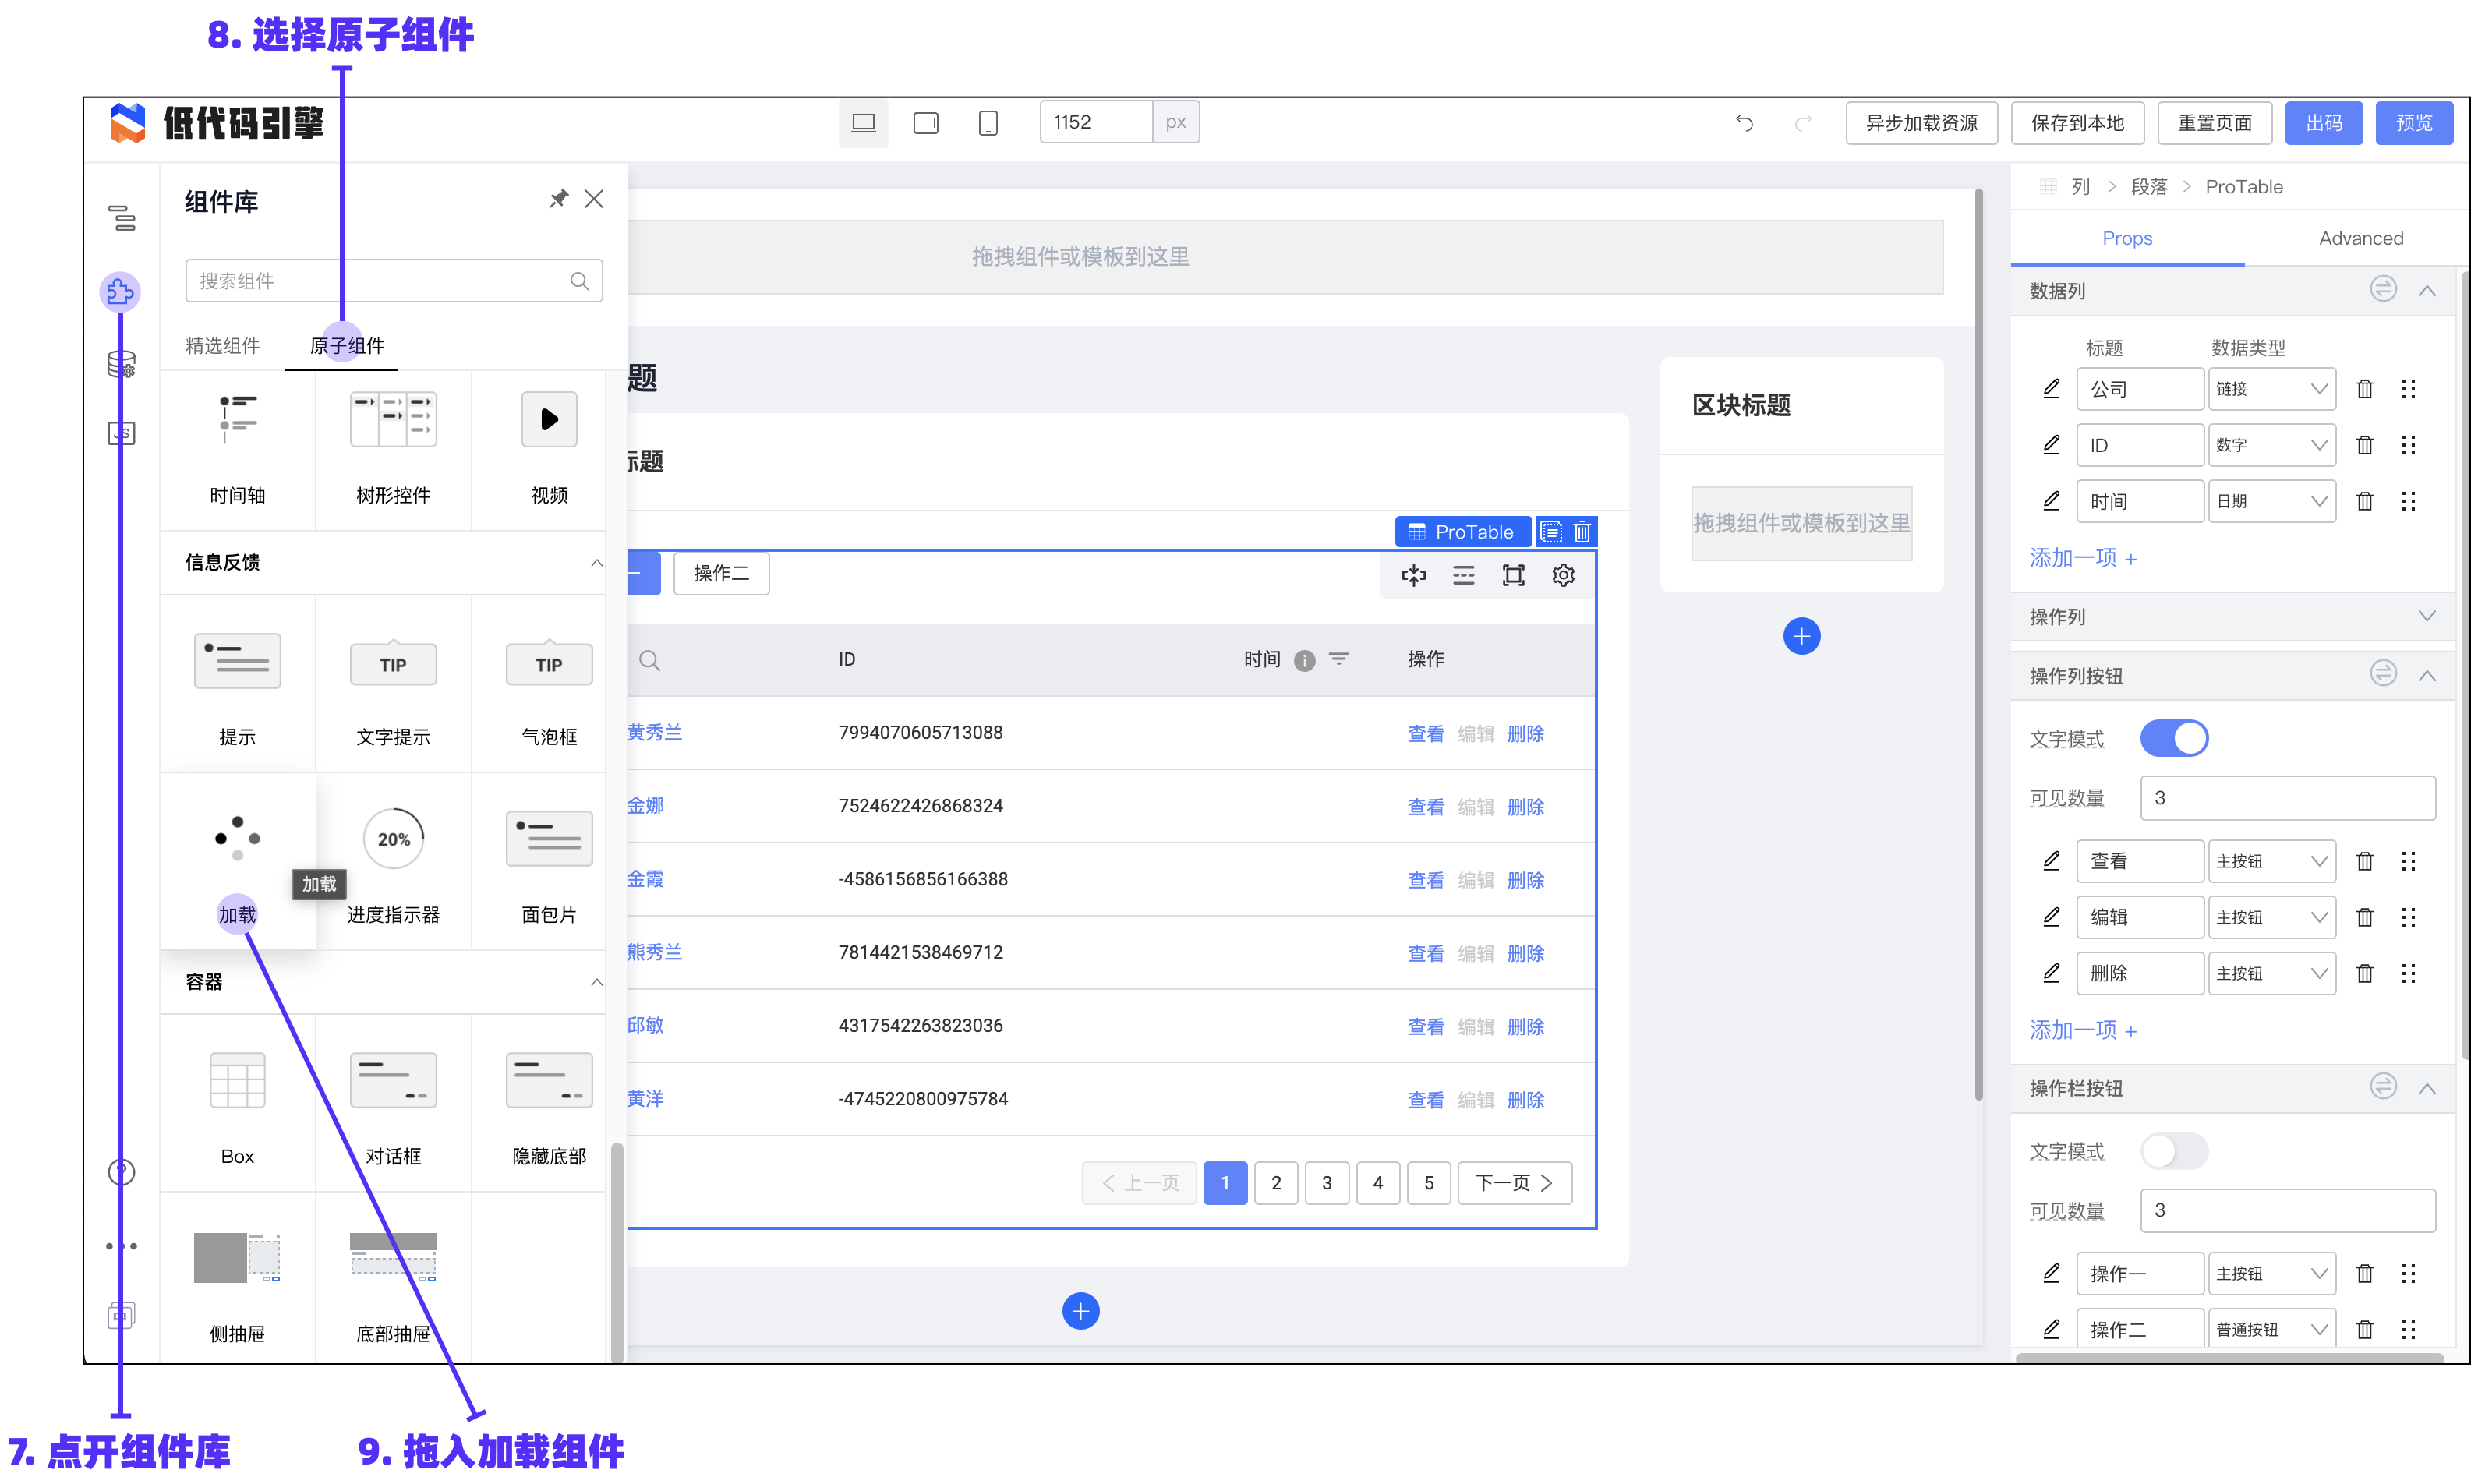
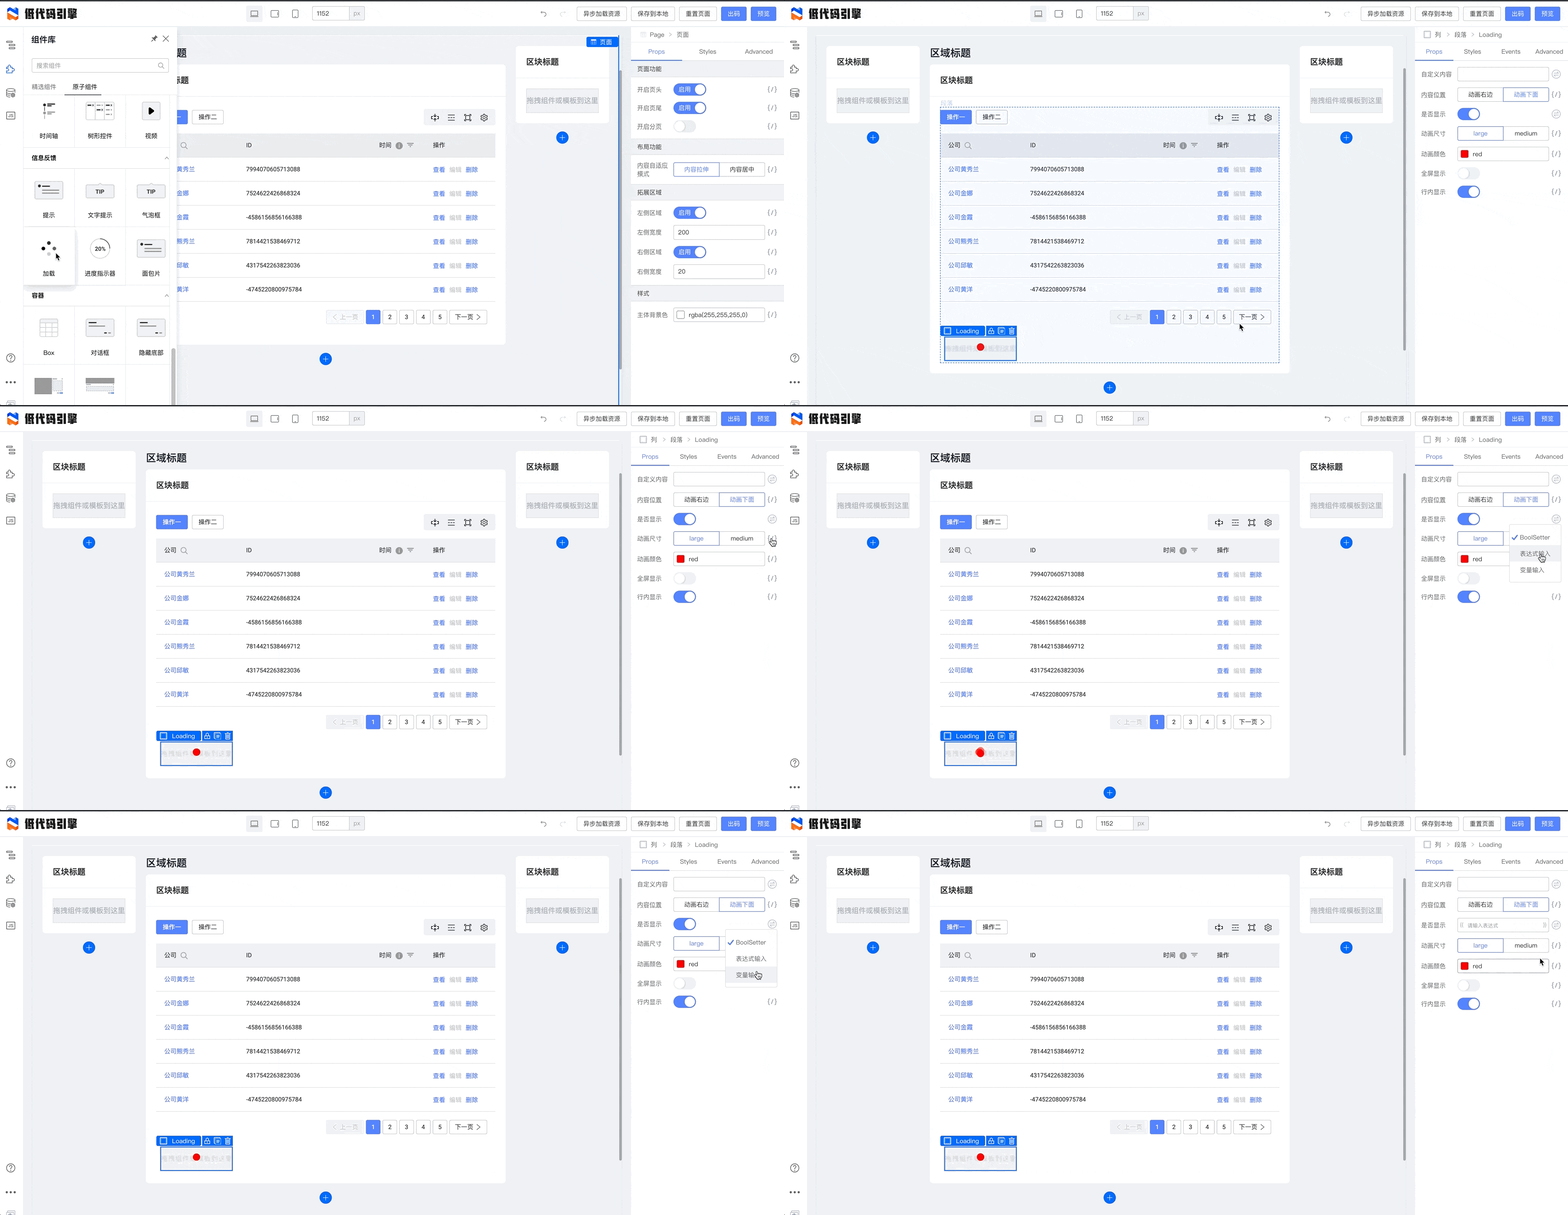
After binding visible on Loading to this.state.loading, a slot appears. Drop other components into the slot:
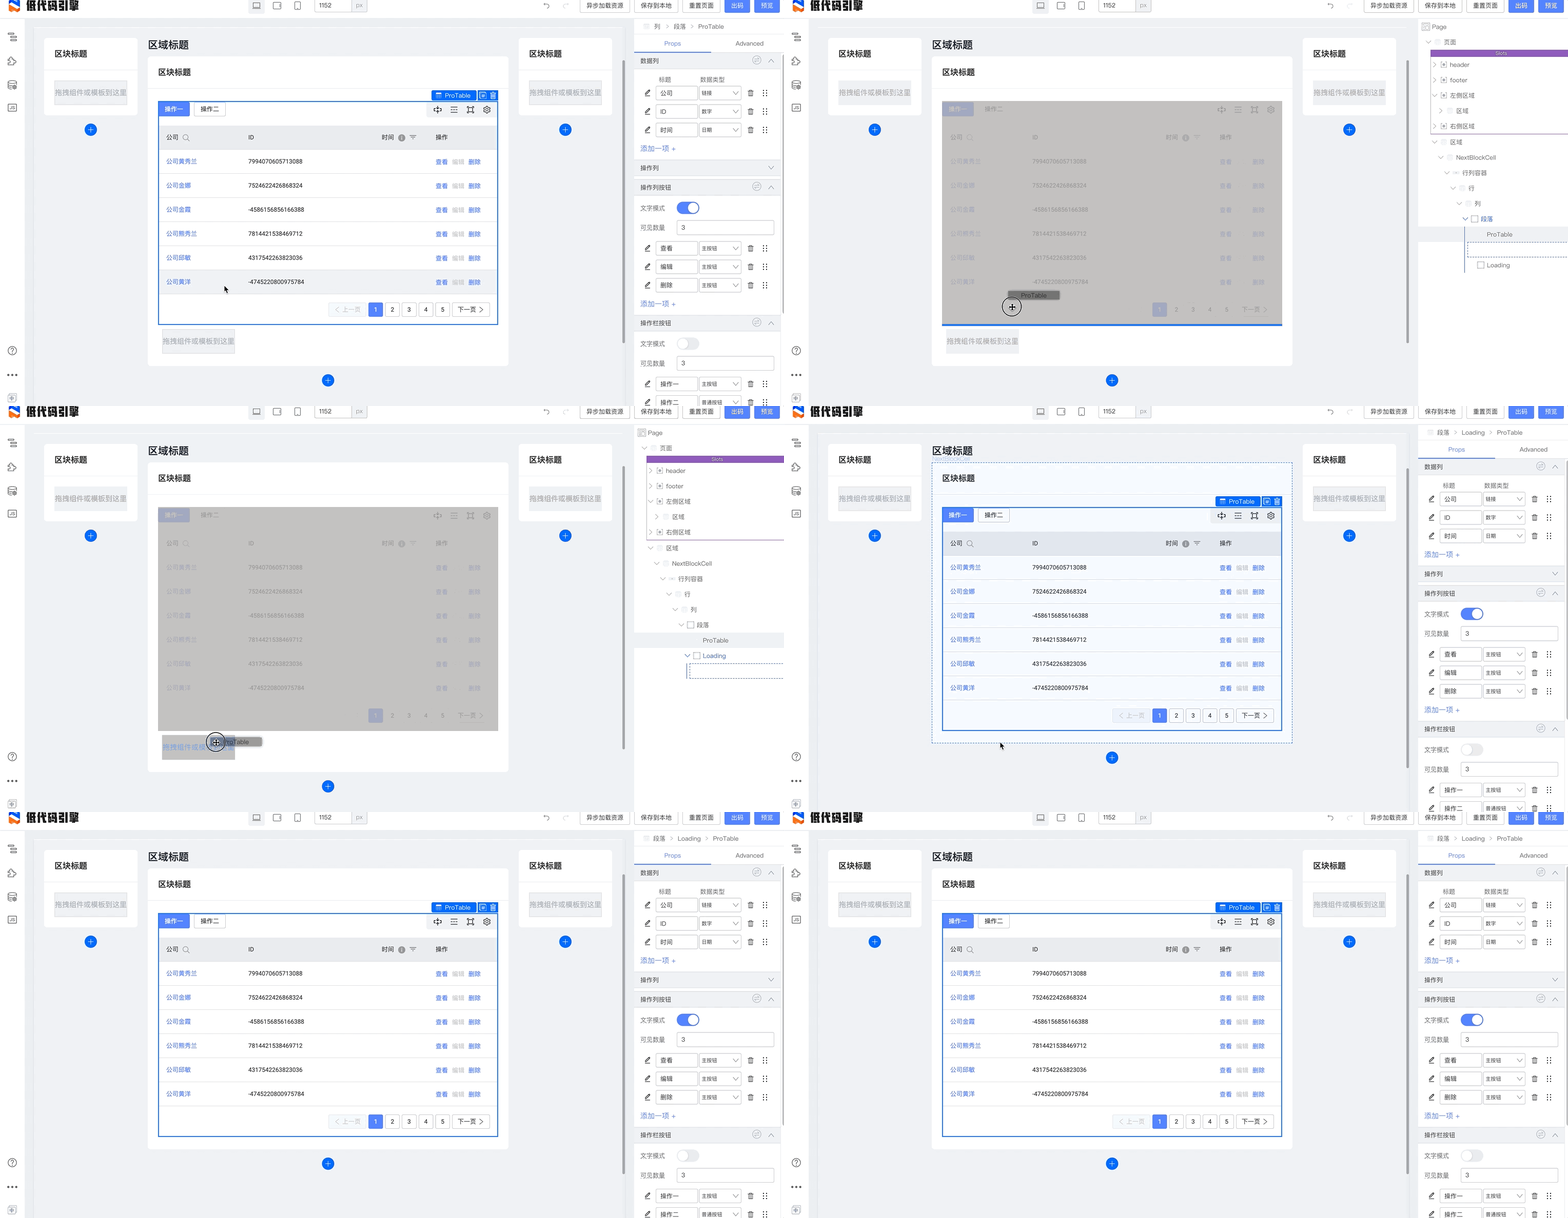
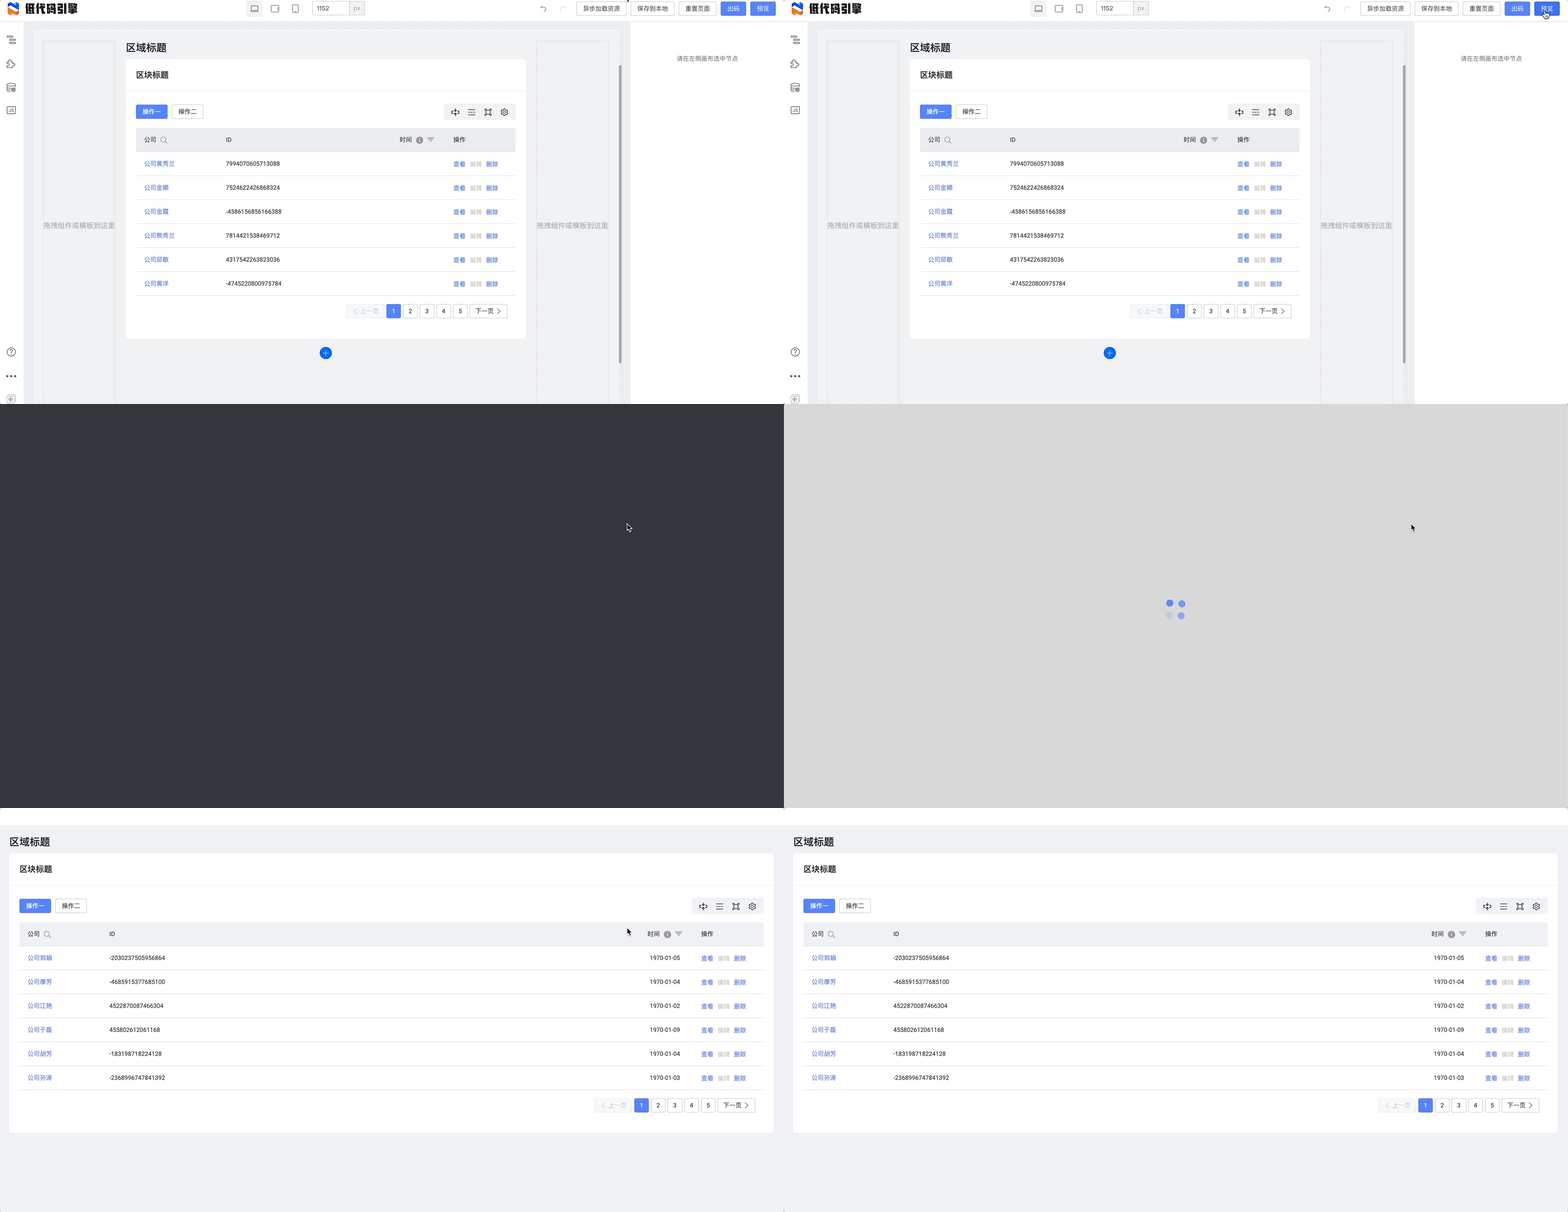
Click Preview (top right) to see the live request:
Column dialog hook
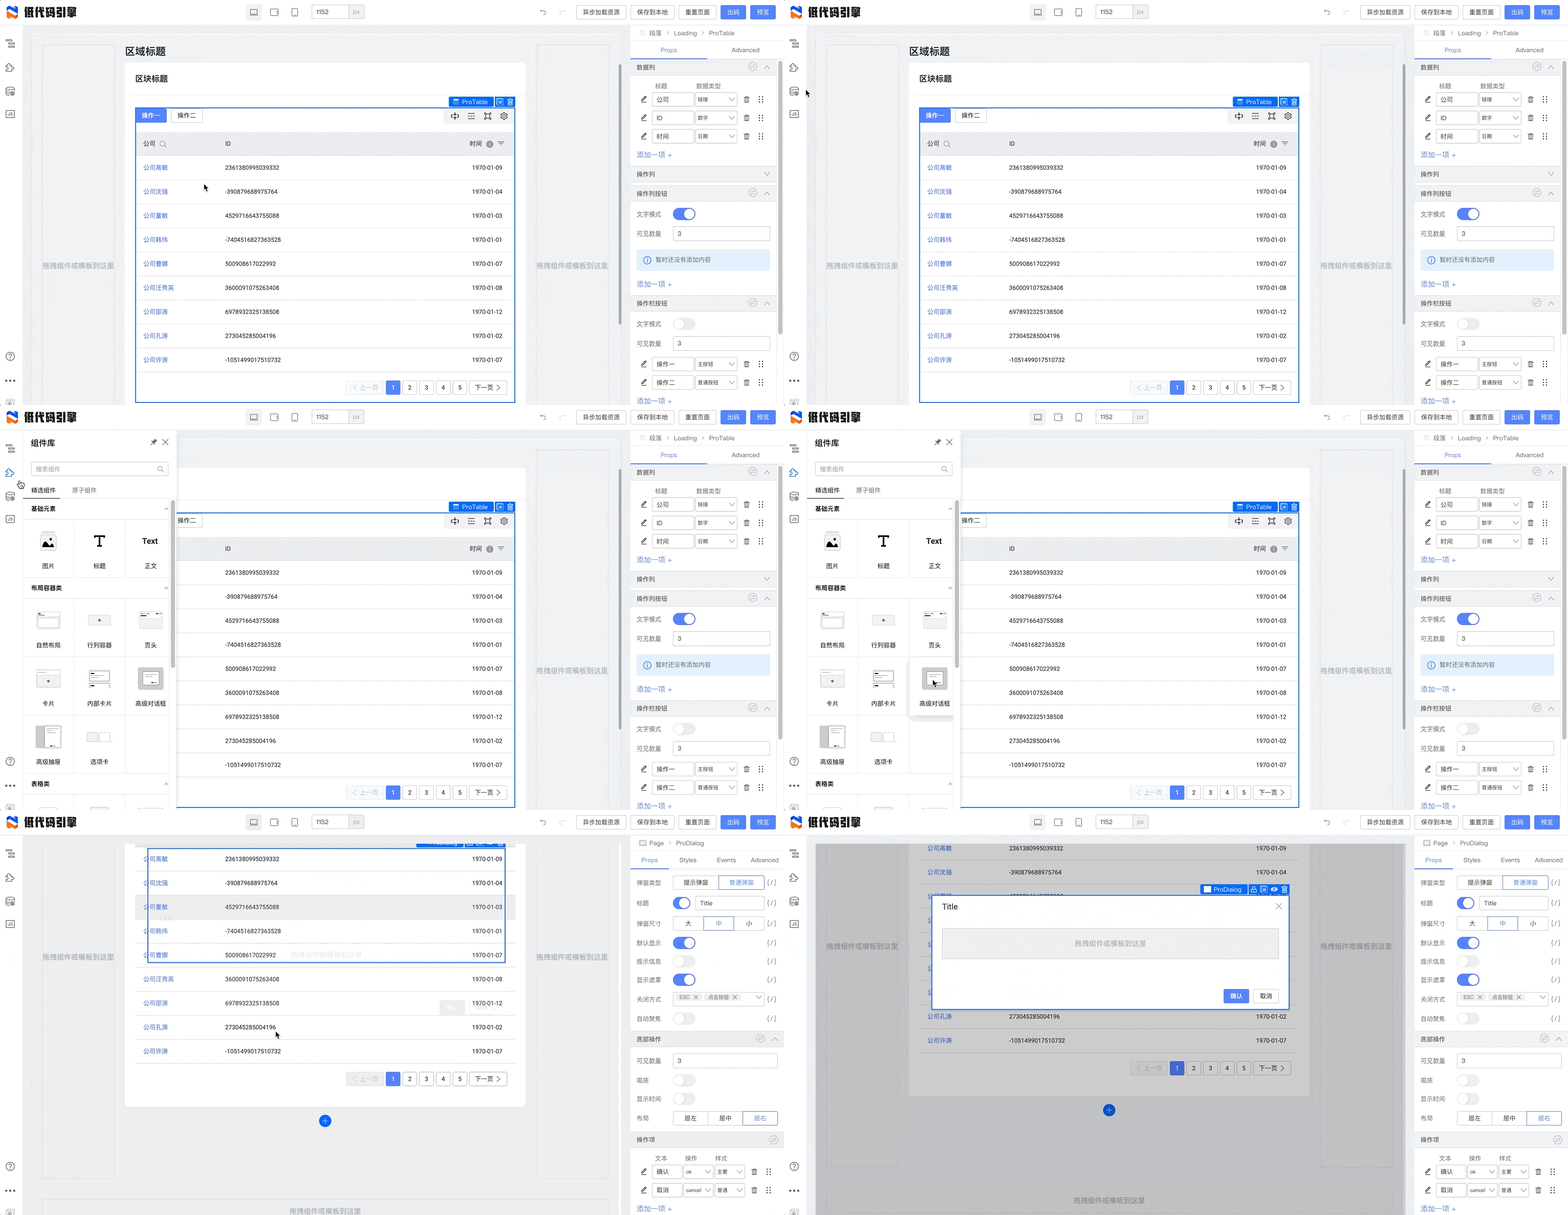
To open a dialog from a table column, first add a dialog:
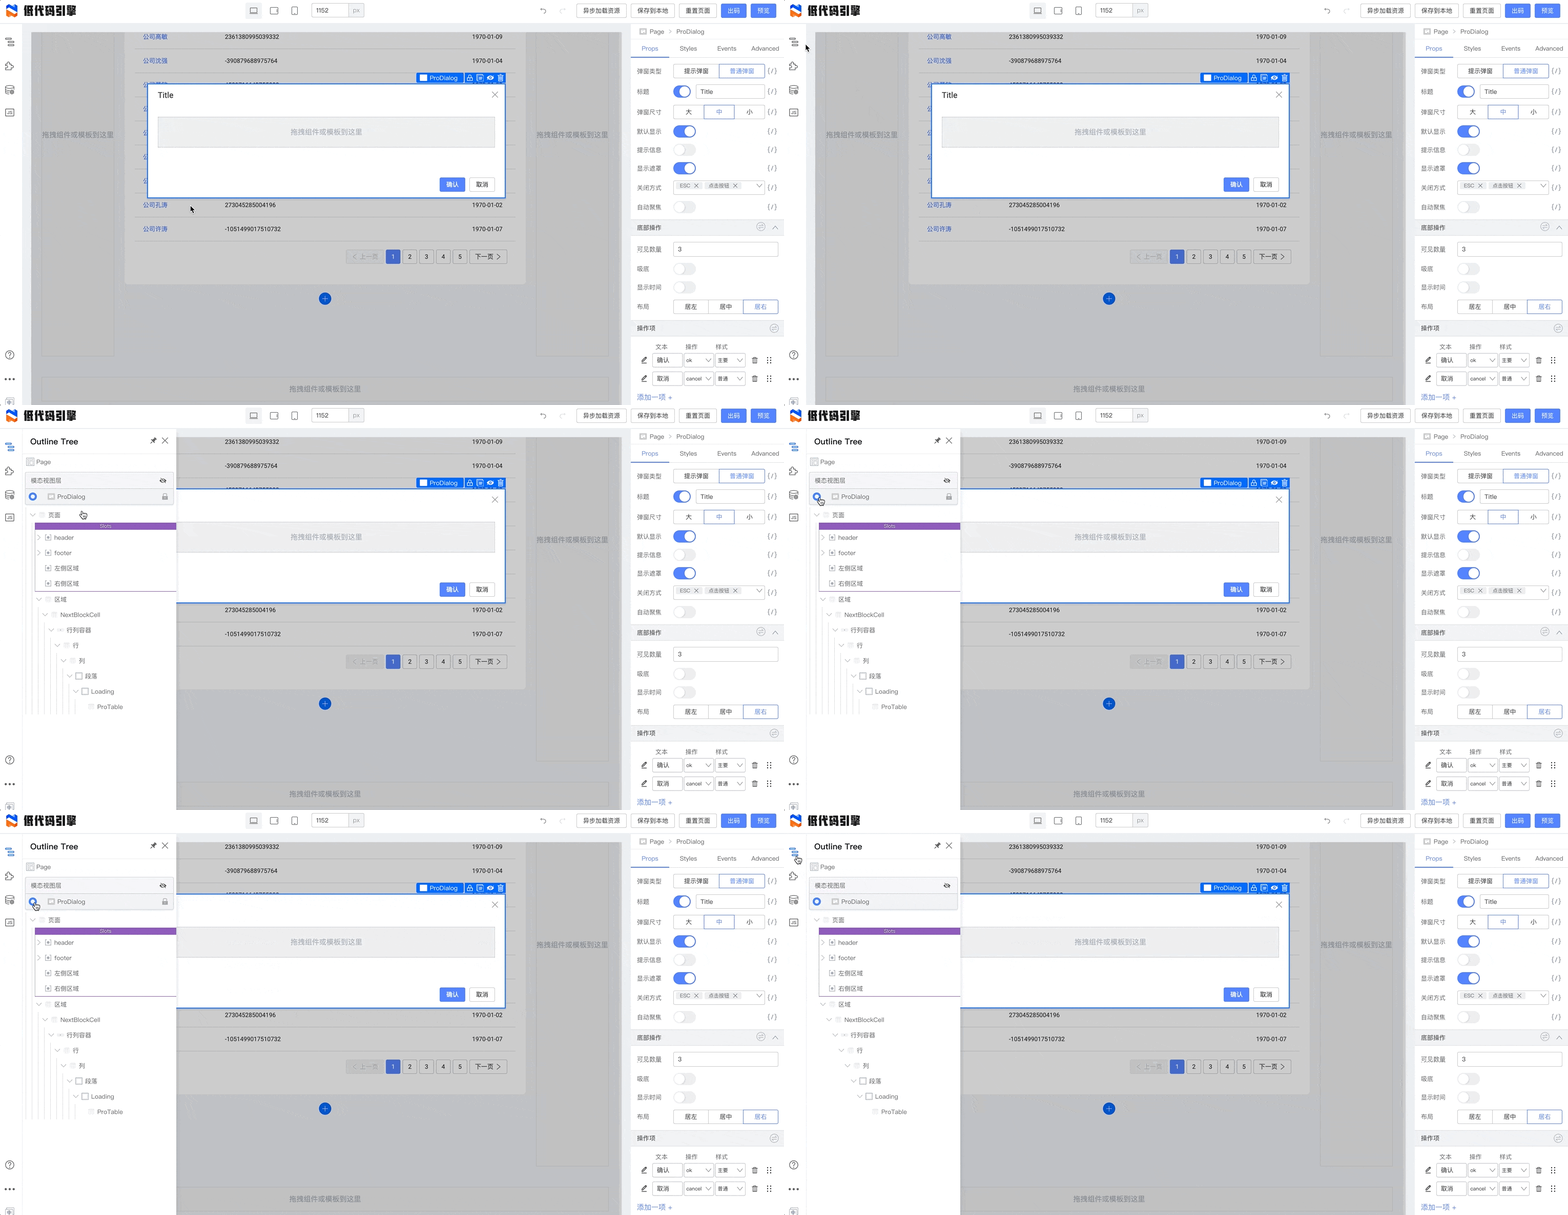
Use the outline tree to show/hide the dialog while editing:
Add a data column:

Set its action to Dialog:
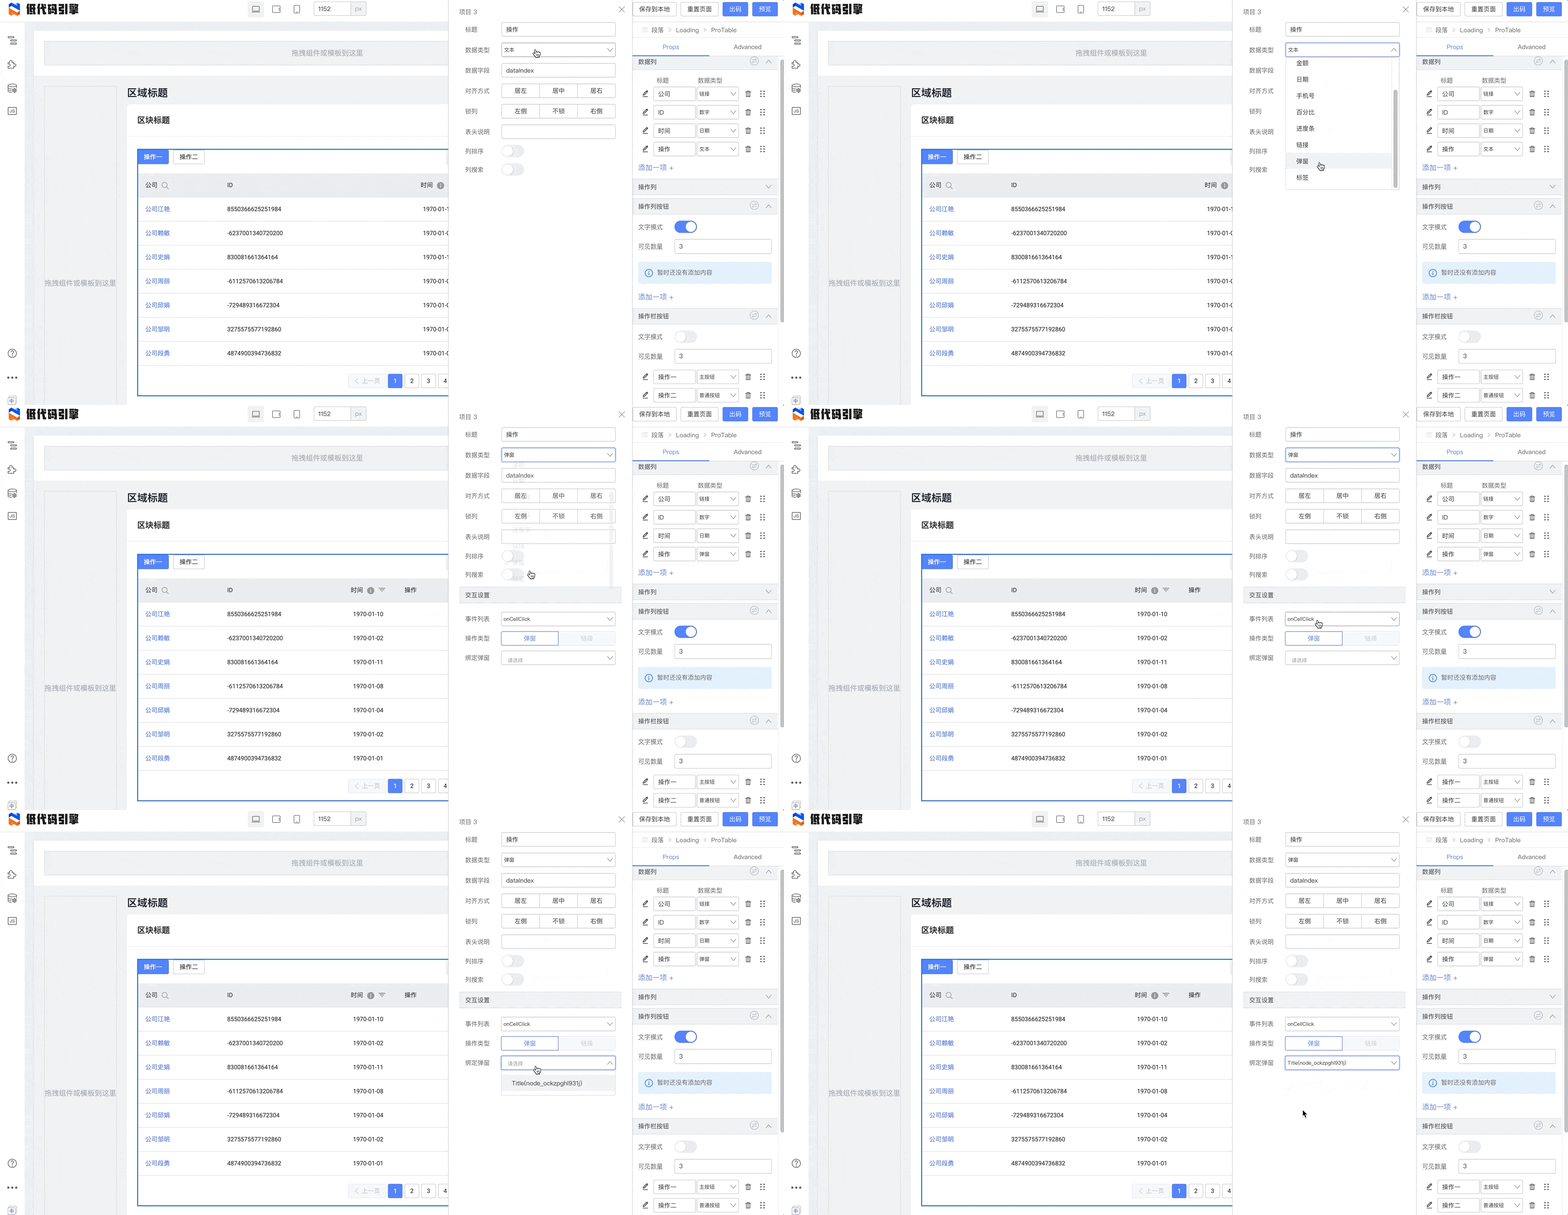
Result:

Event callbacks
The previous section bound behavior on a data column. Here we bind the action column. Click Add item under the action buttons:
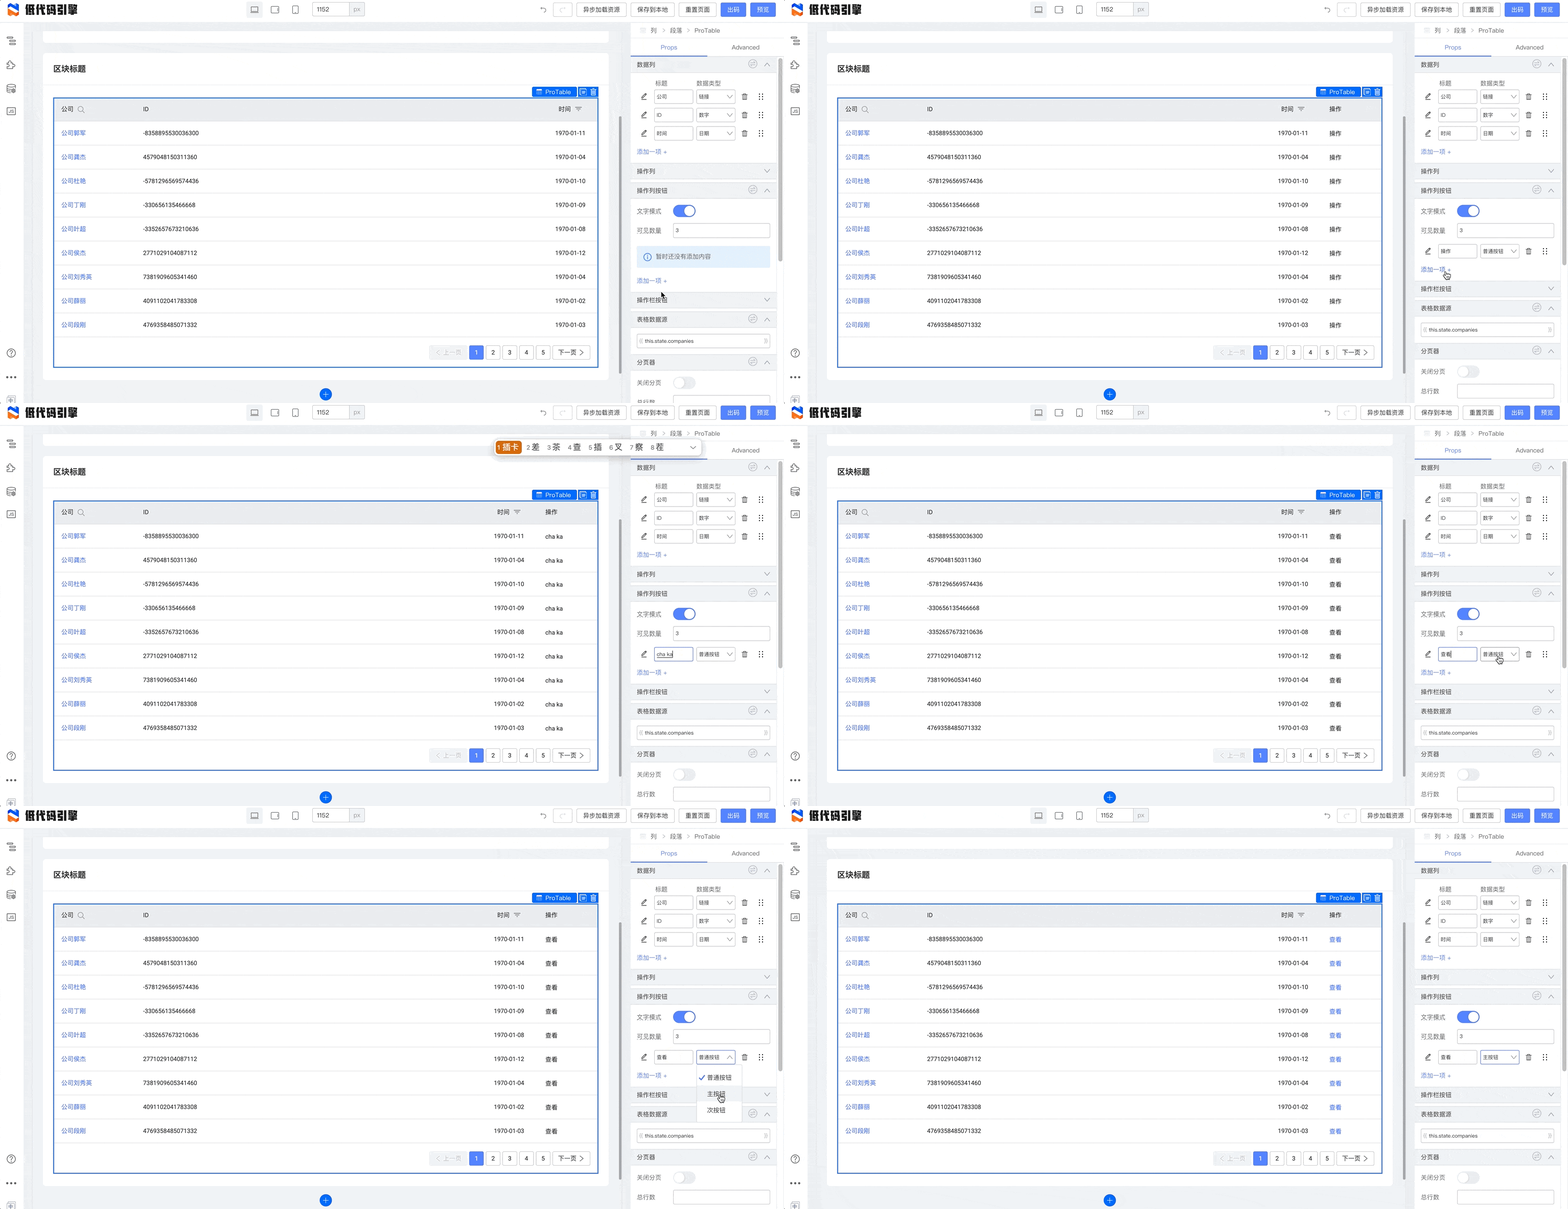
Select the detail button and configure its event callback:
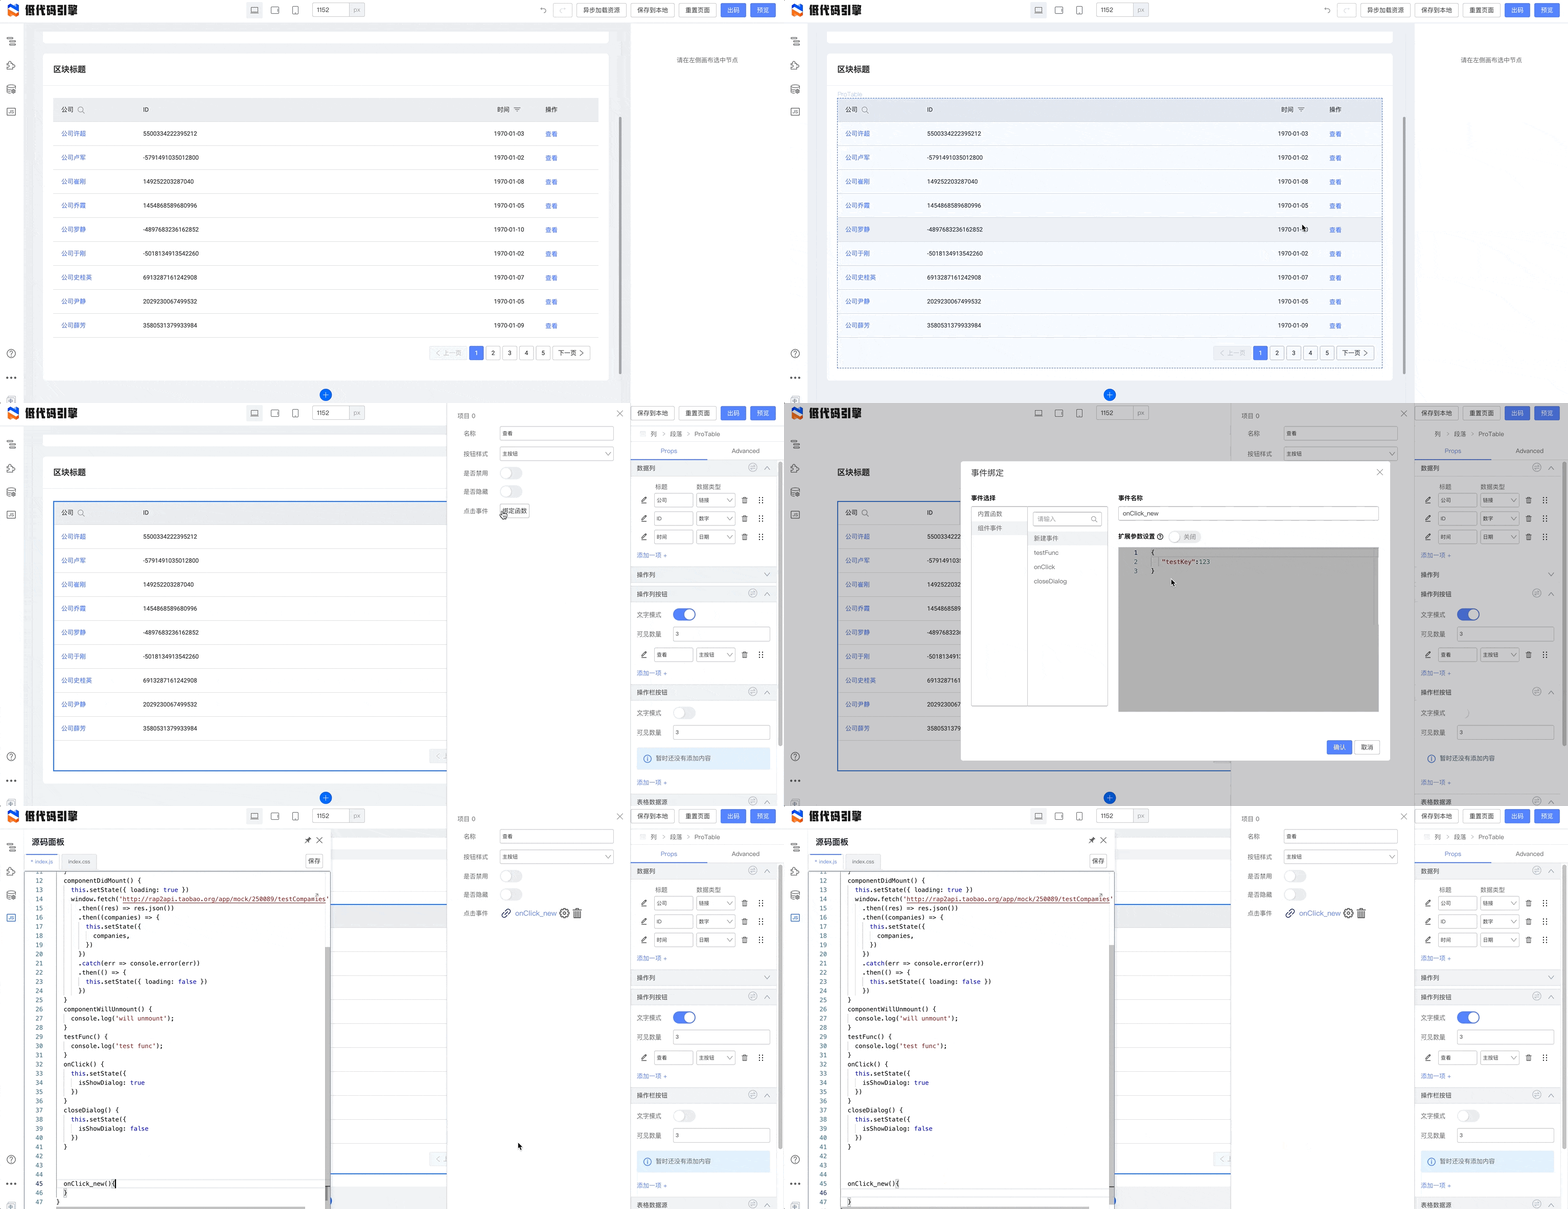
In code, define the handler:
onClick_new(e, { rowKey, rowIndex, rowRecord }){
  window.Next.Message.show(JSON.stringify({ rowKey, rowIndex, rowRecord }))
}
Save and preview:
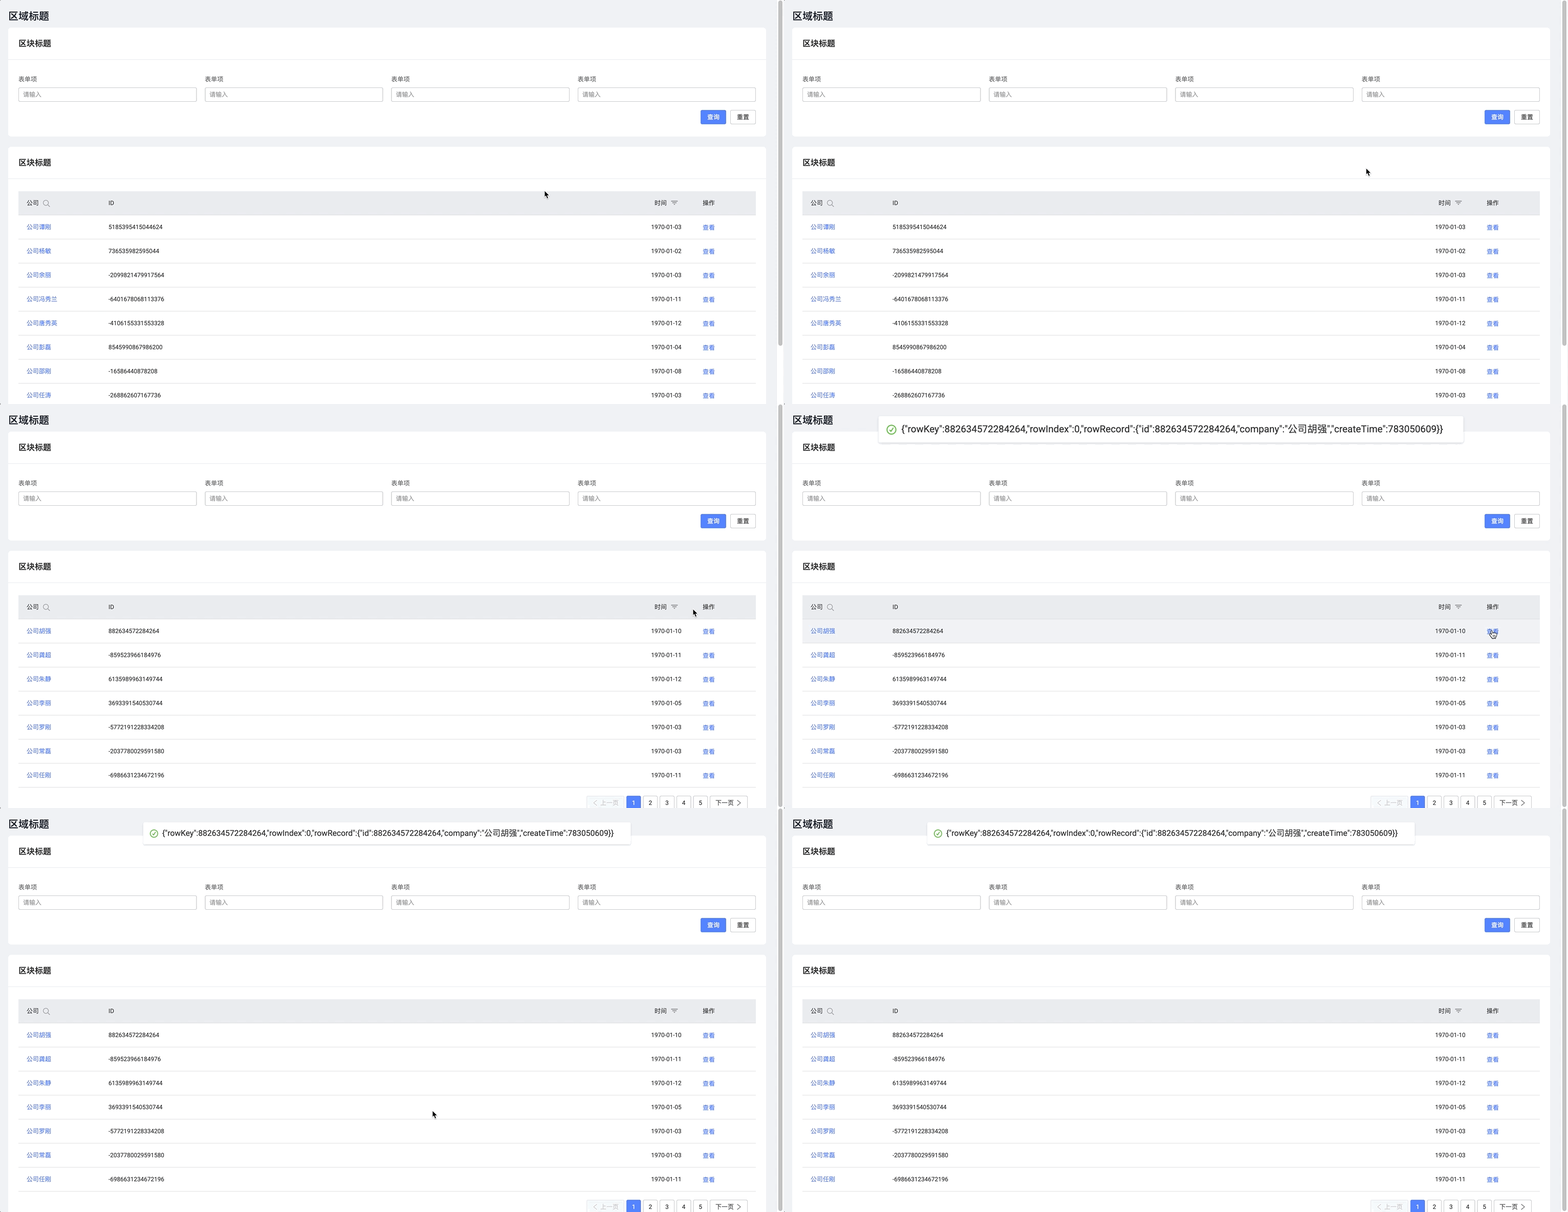
Study the example schema
The example schema is hosted here: https://mo.m.taobao.com/marquex/lowcode-showcase-table
Import it via the Schema panel (bottom left).
