Setter Extension
Setter Overview
Setters are mainly used to configure low-code component property values. As the name suggests, they are called "setters" or Setters. Because component properties have various types, each type needs a corresponding setter. Each setter corresponds to one value type.
Designer Display Location
Setters are displayed in the right area of the editor, as shown below:
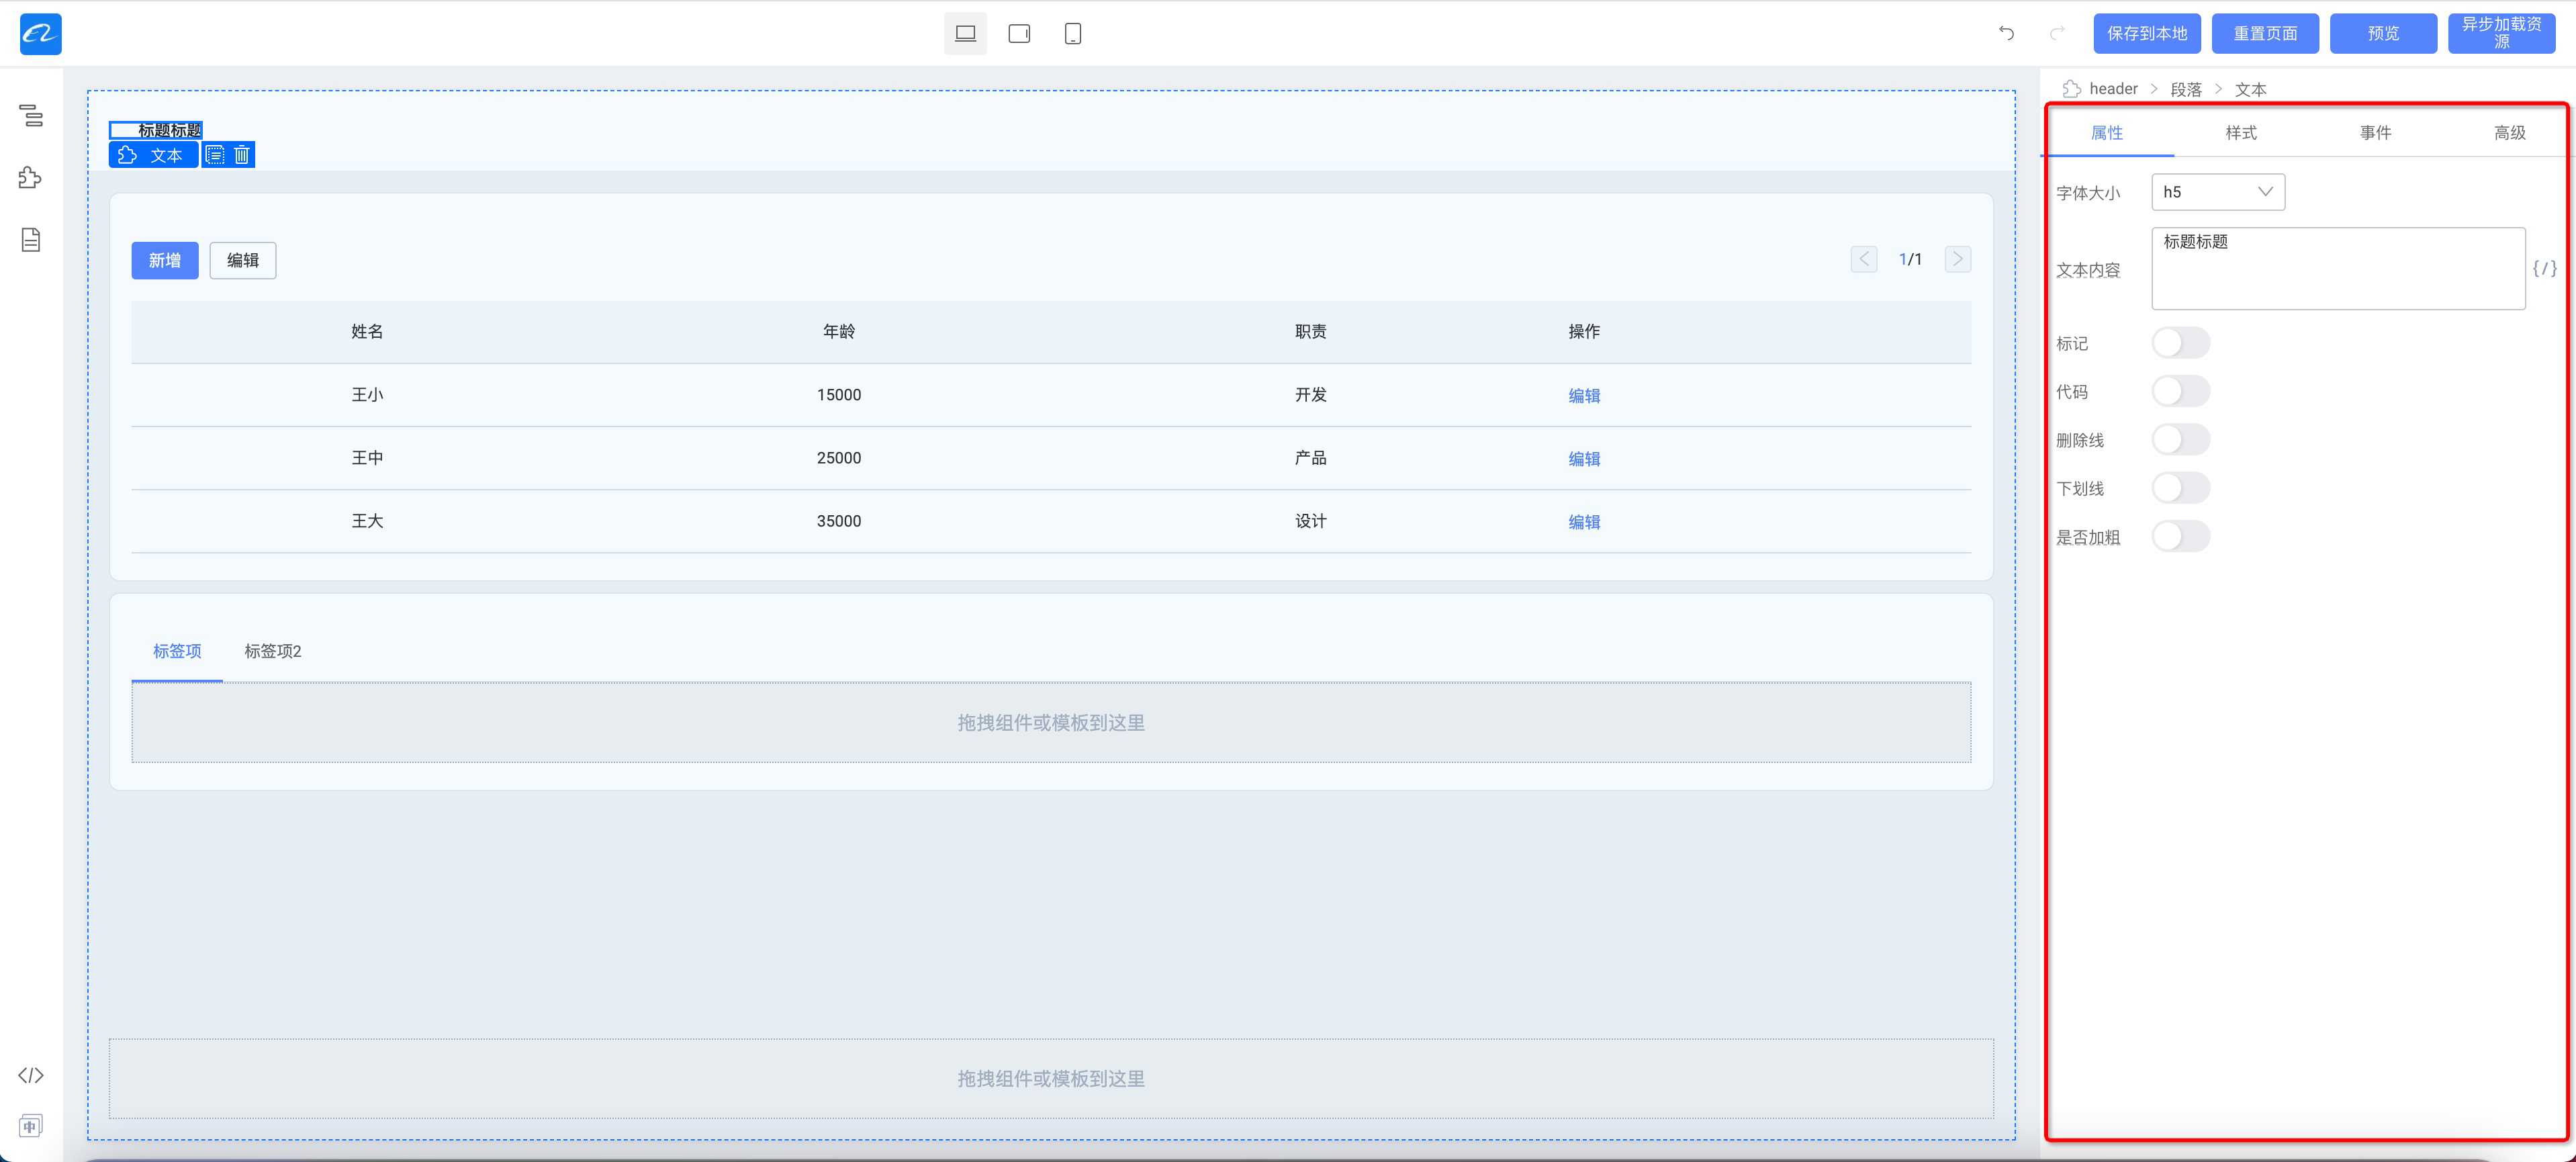
It includes four types of setters:
- Properties: Displays conventional properties of the material
- Style: Displays style properties of the material
- Events: If the material declares events, an events panel appears for binding events.
- Advanced: Two logic-related properties—conditional rendering and loop
Setter Types
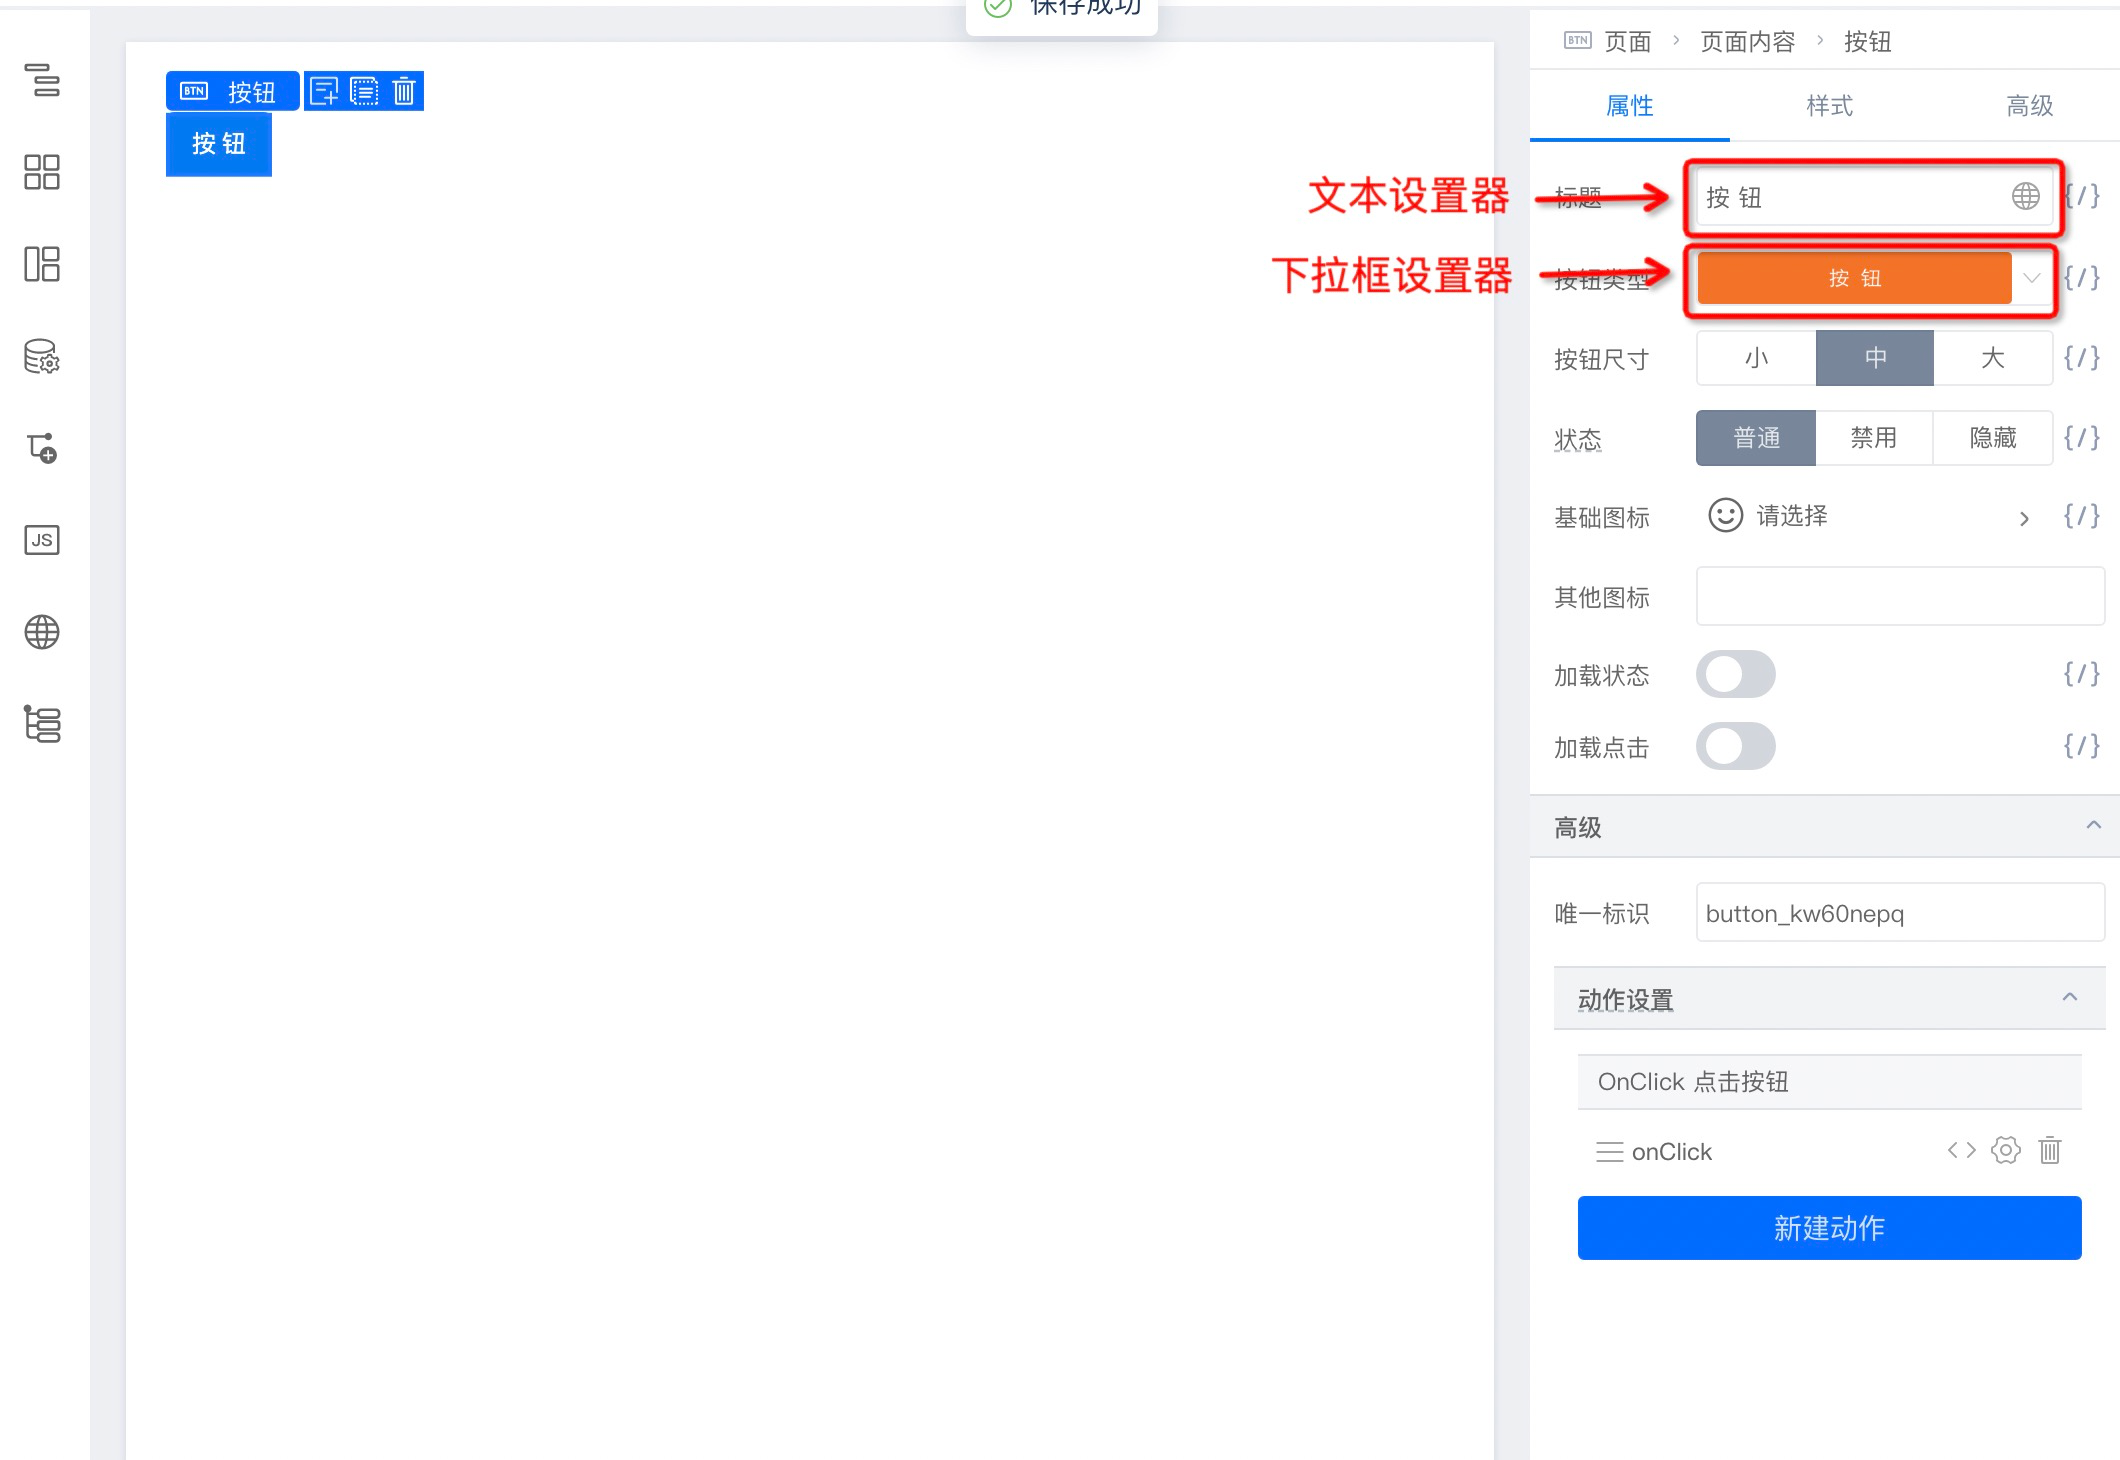
The above areas contain multiple setters. For a component, each configuration item corresponds to one setter. For example, if the configuration is text, you need a text setter; if it is a number, you need a number setter. In the image below, the title and button type configurations use a text setter and a dropdown setter respectively.
We provide commonly used setters as built-in setters and also provide customization capabilities for developing setters with specific requirements.
Configuring Setters for Materials
We provide commonly used setters as built-in setters.
You can configure the target component's property value types in the material resource configuration file:
{
  "componentName": "Message",
  "title": "Message",
  "configure": {
    "props": [
      {
        "name": "type",
        "setter": "InputSetter"
      }
    ]
  }
}
The props field is automatically filled by the material ingestion module scan. Users can configure through the configure node and redefine property declarations through the override node. setter is the setter registered in the engine.
When configuring built-in engine setters for materials, you can use the advanced features of the corresponding setter. See the corresponding setter article under the "All Built-in Setters" section.
Advanced feature configuration example:
For example, to configure the units property in NumberSetter, declare it in asset.json.
"configure": {
  "component": {
    "isContainer": true,
    "nestingRule": {
      "parentWhitelist": [
        "NextP"
      ]
    }
  },
  "props": [
    {
      "name": "width",
      "title": "Width",
      "initialValue": "auto",
      "defaultValue": "auto",
      "condition": {
        "type": "JSFunction",
        "value": "() => false"
      },
      "setter": {
        "componentName": "NumberSetter",
        "props": {
          "units": [
            {
              "type": "px",
              "list": true
            },
            {
              "type": "%",
              "list": true
            }
          ]
        }
      }
    },
  ],
  "supports": {
    "style": true
  }
},
Custom Setters
Writing AltStringSetter
We write a simple Setter with the following functionality:

Code:
import * as React from 'react';
import { Input } from '@alifd/next';
import './index.scss';

interface AltStringSetterProps {
  // current value
  value: string;
  // default value
  defaultValue: string;
  // setter sole output
  onChange: (val: string) => void;
  // AltStringSetter special config
  placeholder: string;
}

export default class AltStringSetter extends React.PureComponent<AltStringSetterProps> {
  // Declare Setter title
  static displayName = 'AltStringSetter';

  componentDidMount() {
    const { onChange, value, defaultValue } = this.props;
    if (value == undefined && defaultValue) {
      onChange(defaultValue);
    }
  }

  render() {
    const { onChange, value, placeholder } = this.props;
    return (
      <Input
        value={value}
        placeholder={placeholder || ''}
        onChange={(val: any) => onChange(val)}
      ></Input>
    );
  }
}
Linkage Between Setters and Setters/Plugins
We use emit for communication. First, register an event in setter A:
import { event } from '@rchh/lowcode-engine';

componentDidMount() {
        // Because the panel may have multiple setters, use field.id to mark the setter name
    this.emitEventName = `${SETTER_NAME}-${this.props.field.id}`;
    event.on(`${this.emitEventName}.bindEvent`, this.bindEvent);
}

bindEvent = (eventName) => {
  // do someting
}

componentWillUnmount() {
  // Setters are instance-based; unregister events when a setter is disposed to avoid event pool growth
  event.off(`${this.emitEventName}.bindEvent`, this.bindEvent);
}
Trigger the event in setter B to complete communication:
import { event } from '@rchh/lowcode-engine';

bindFunction = () => {
  const { field, value } = this.props;
  // Shows communicating with a plugin; event naming is pluginName + method
  event.emit('eventBindDialog.openDialog', field.name, this.emitEventName);
};
Modifying Other Sibling Prop Values
A setter only affects one prop's value. To affect other component props, use the field's props:
bindFunction = () => {
  const { field, value } = this.props;
  const propsField = field.parent;
  // Get sibling prop showJump value
  const otherValue = propsField.getPropValue('showJump');
  // Set sibling prop showJump value
  propsField.setPropValue('showJump', false);
};
Registering AltStringSetter
Register the Setter in the low-code engine so it can be used in materials by the name AltStringSetter.
import AltStringSetter from './AltStringSetter';
const registerSetter = window.AliLowCodeEngine.setters.registerSetter;
registerSetter('AltStringSetter', AltStringSetter);
Using in Materials
Configure the target component's property value types in the material resource configuration file. Core configuration:
{
  "props": [
    {
      "name": "type",
      "setter": "AltStringSetter"
    }
  ]
}
Related material configuration:
{
  "componentName": "Message",
  "title": "Message",
  "configure": {
    "props": [
      {
        "name": "type",
        "setter": "AltStringSetter"
      }
    ]
  }
}